...
Prepare a proper CSV file containing checklists. Either manually or by exporting from Jira
Learn how Export issues with checklists to CSV works
You can do it via the Issues Search form
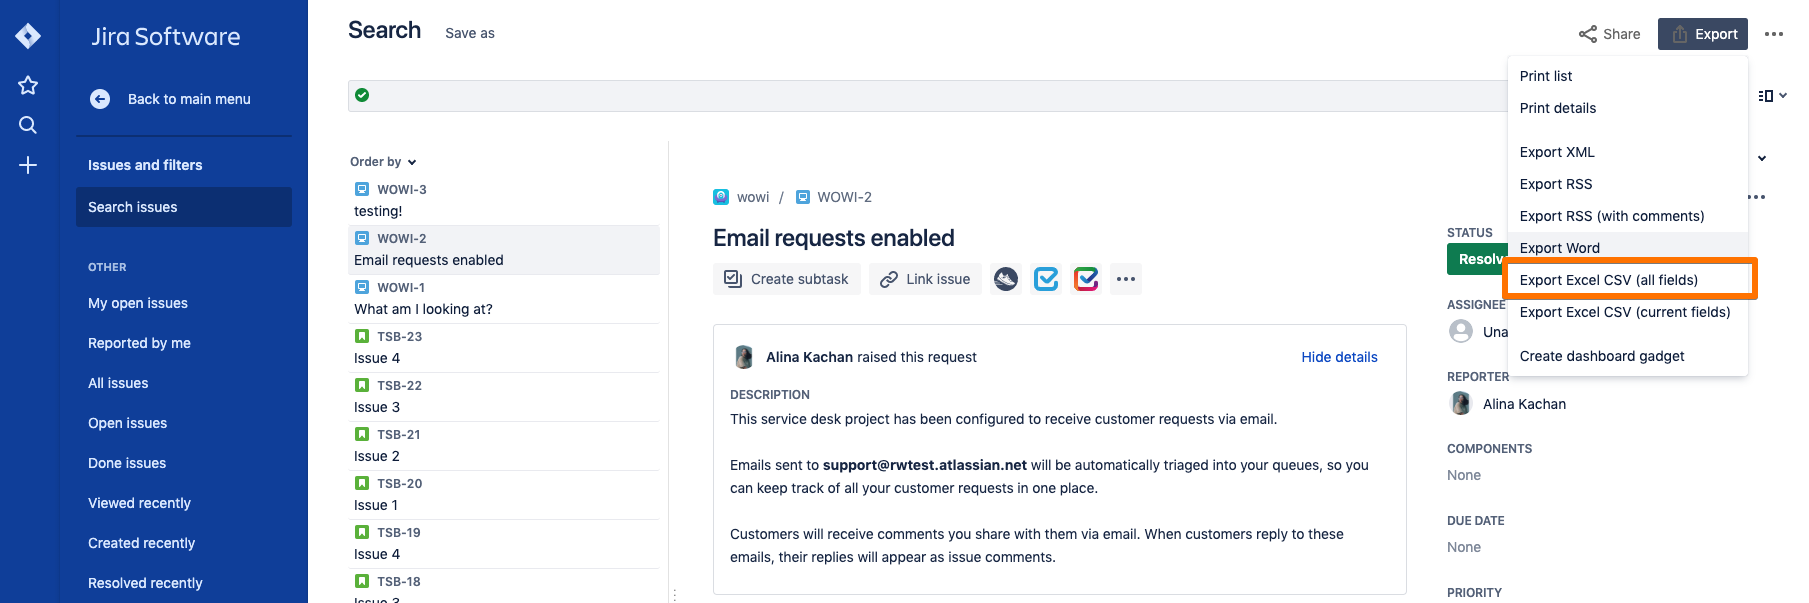

Clean up CSV, leave only needed columns (fields), e.g. Issue Key (for future mapping Jira issues), Summary, Checklists, Smart Checklist Progress
if issues from more than 1 project are to be imported - then leave Project column in CSV
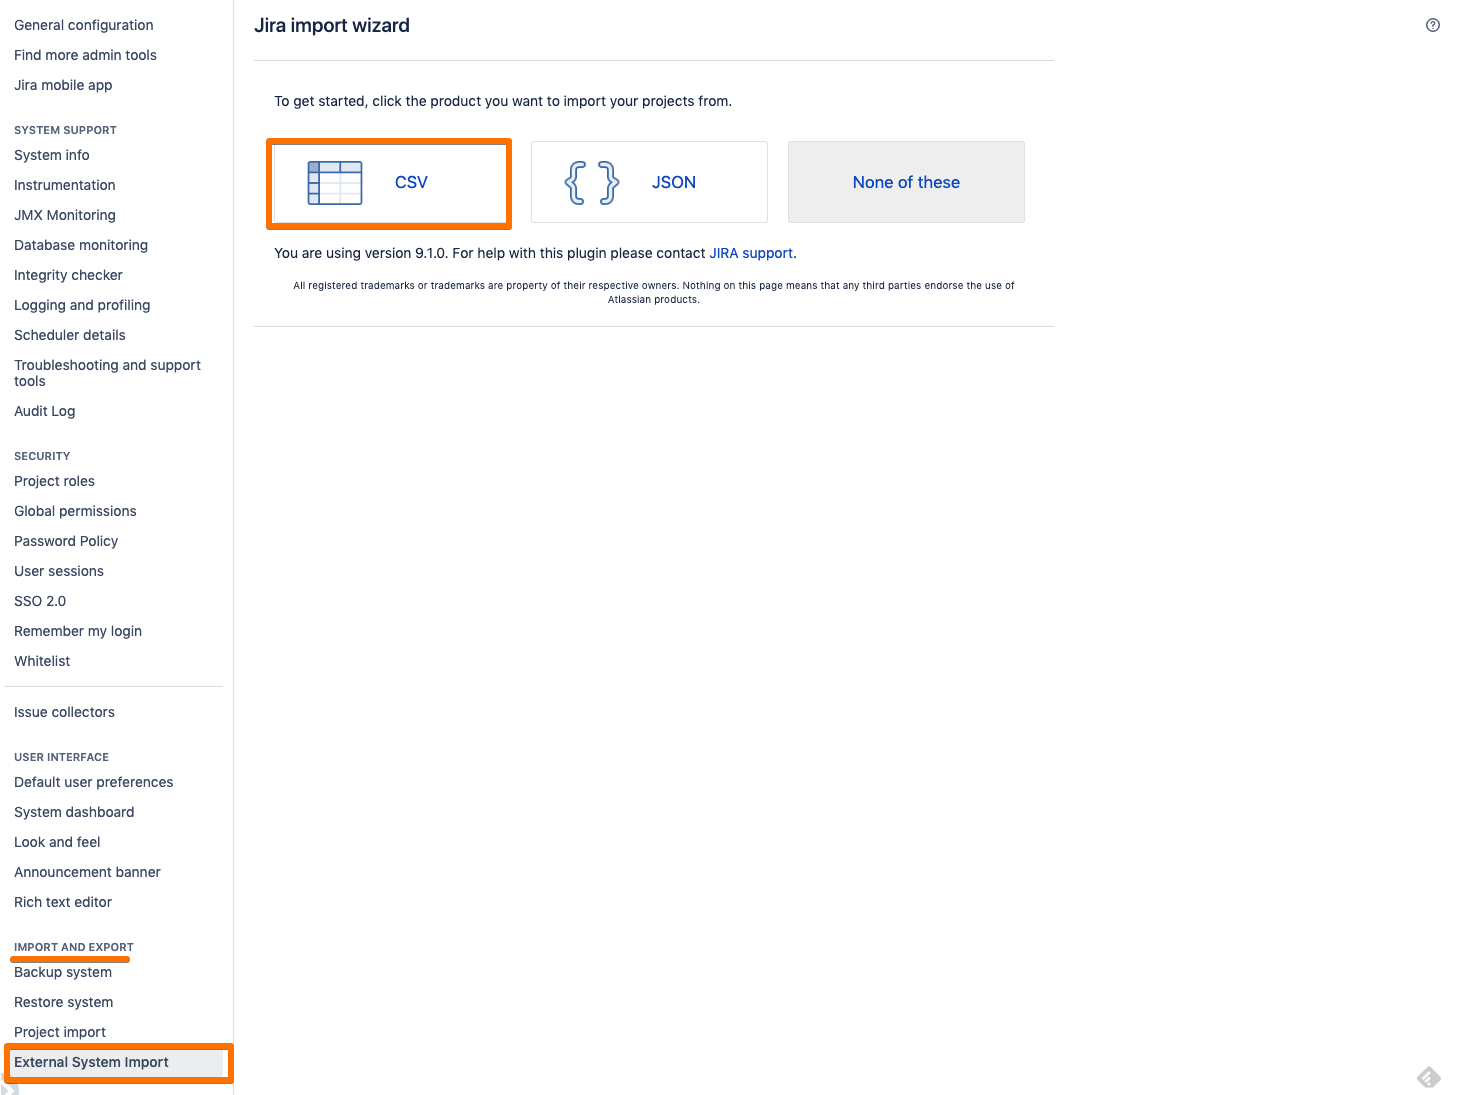
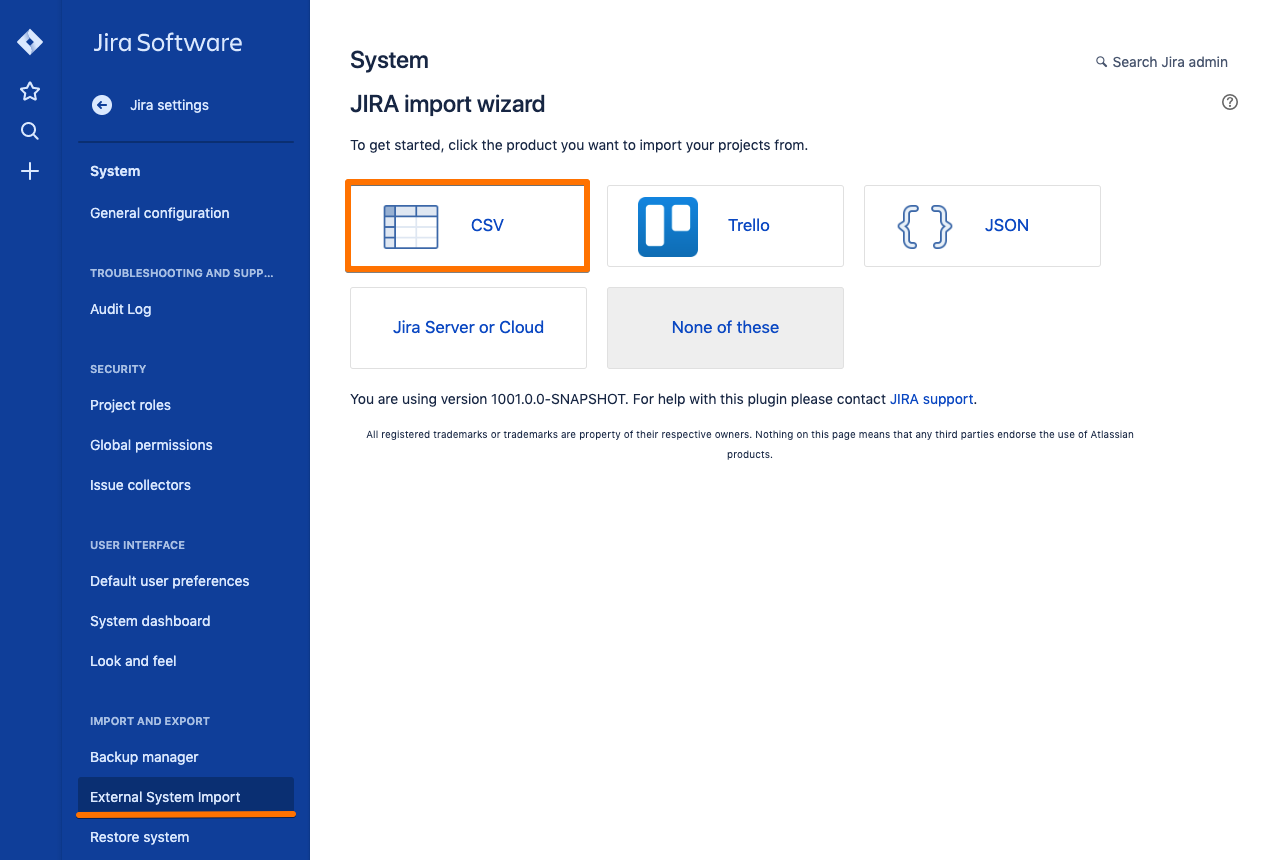
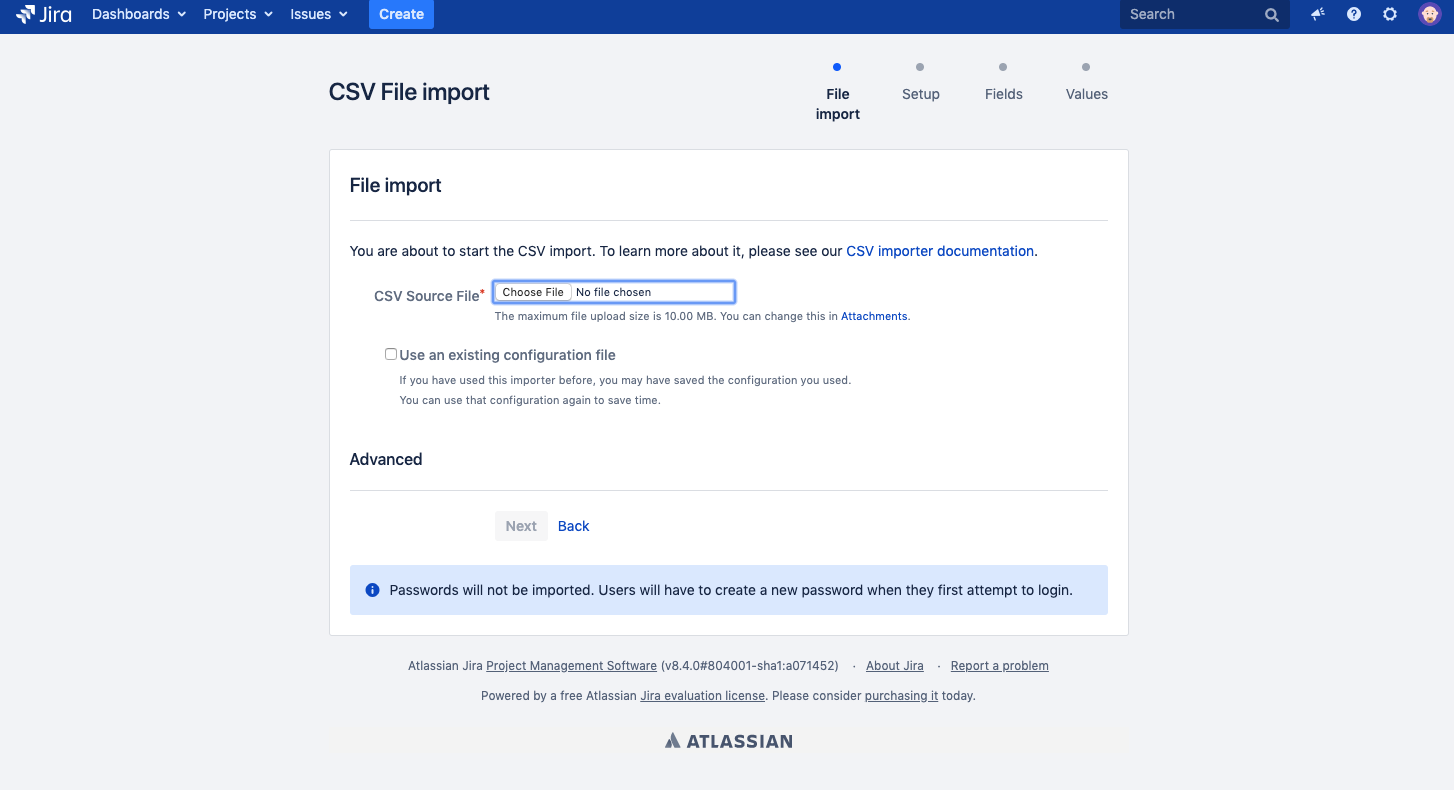
Go to System → Import and Export → External System Import → CSV
Jira Server
Jira Cloud
Choose CSV file
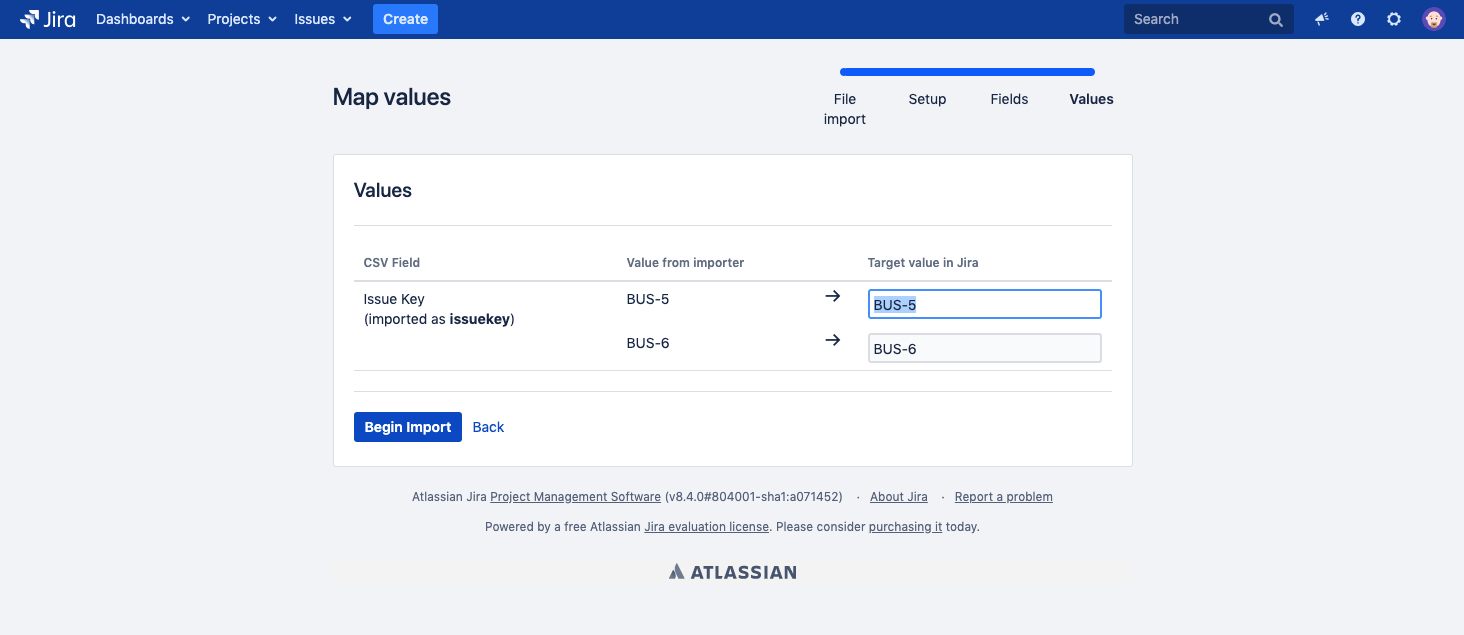
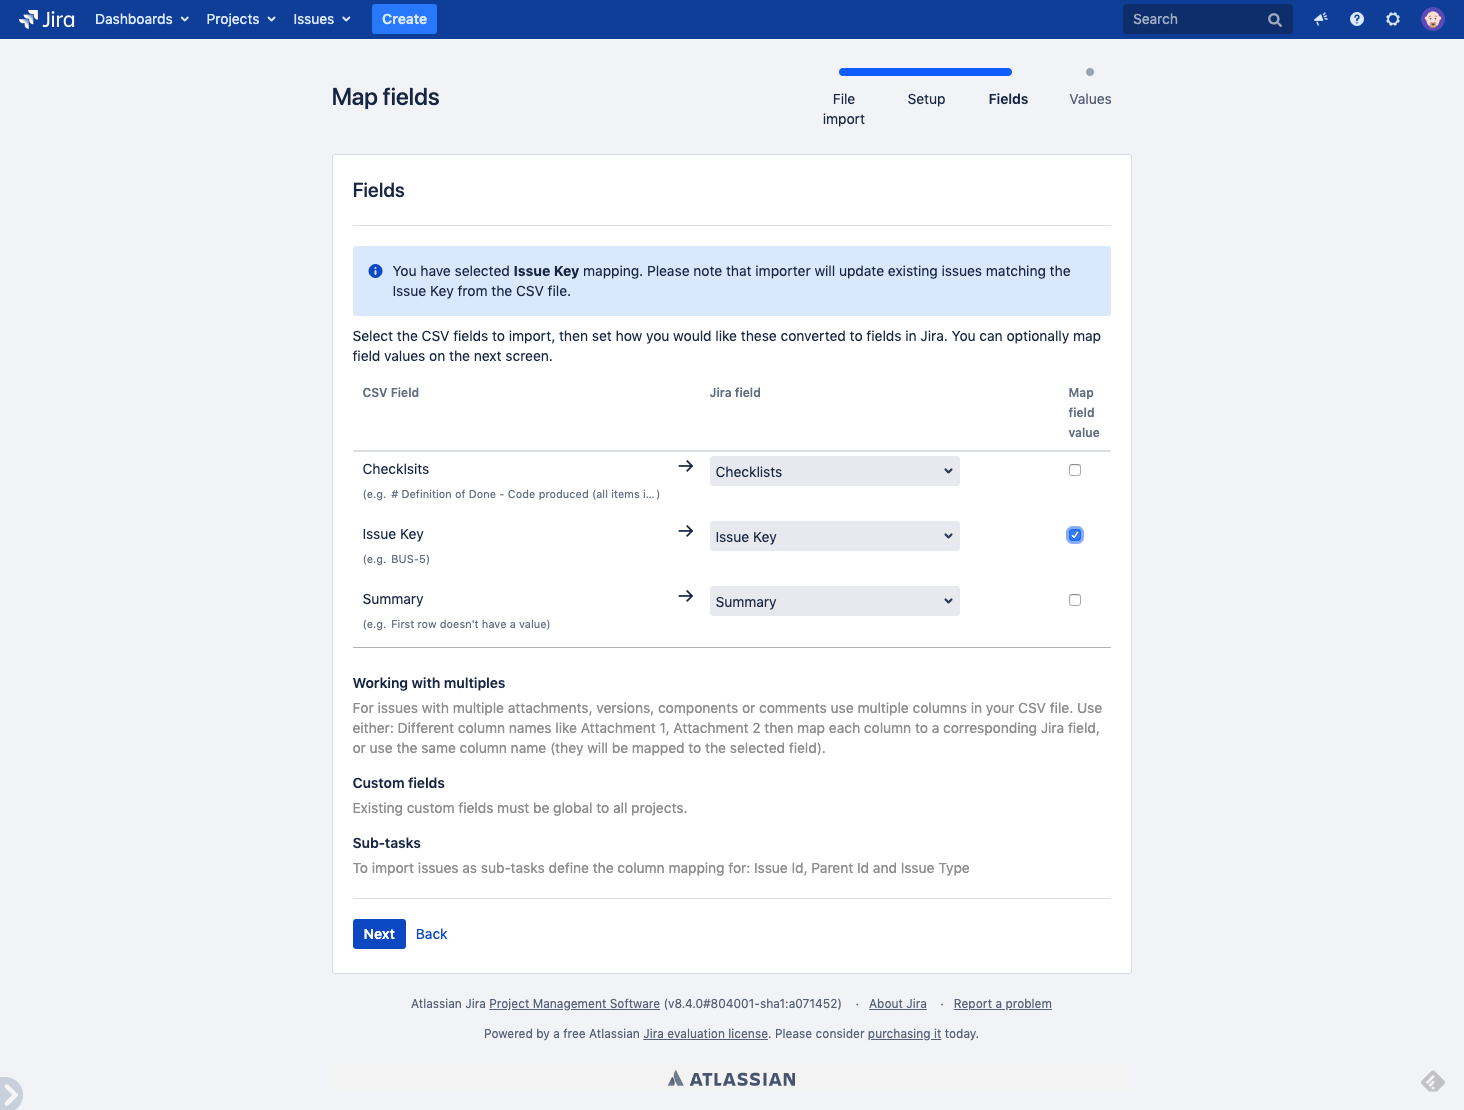
Map fields.
map Issue Key CSV field to Issue Key Jira field and check 'Map field value' (by that field values will be taken for updating a ticket)
map Summary CSV field to Summary Jira field
map Checklists CSV field to Checklists Jira field, however,
 make sure to leavethe 'Map field value' checkbox empty! Otherwise, checklist value won't be imported
Begin import
- Always do test runs on test issues/values!

Once the import is finished - the "Checklists" custom field in proper Jira Issues will get updated with Checklists values from CSV


| Note |
|---|
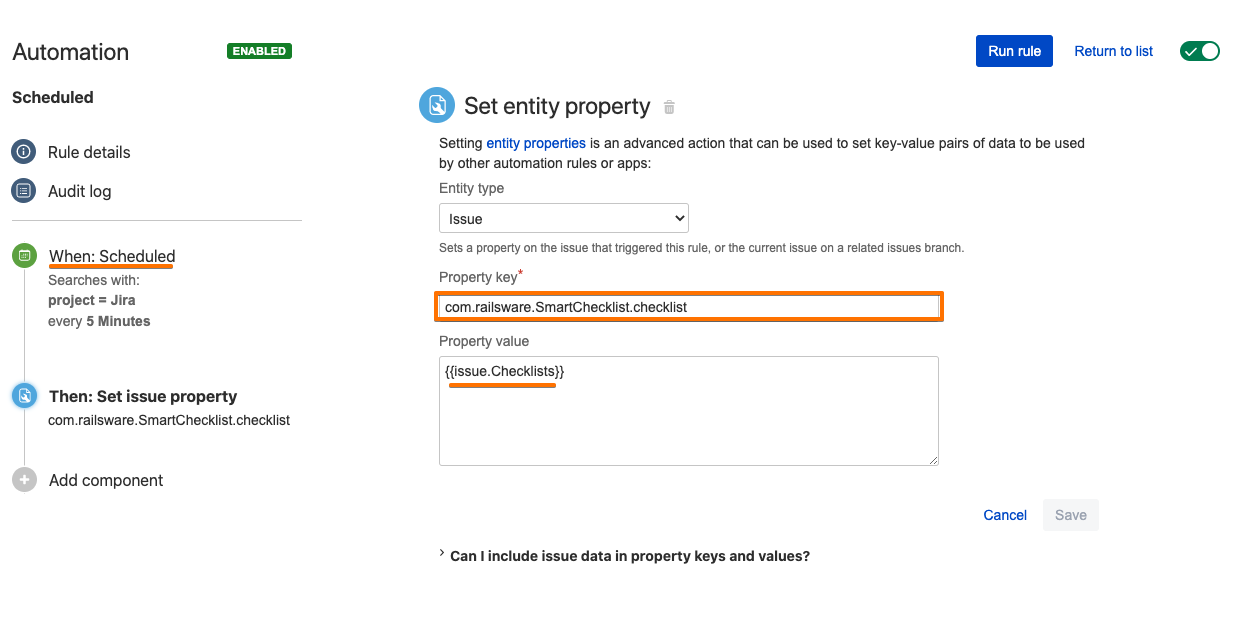
If you importing a checklist into issues that may already contain checklists- you need to additionally sync the "Checklists" field with com.railsware.SmartChecklist.checklist issue property, which now is the main data source. You can utilize any available tools for that. E.g. Automation for Jira for Server The approach is the following
We are working on implementing the easiest way to synchronize checklist storages. So update of the "Checklists" custom field will automatically trigger checklist update even if there already were some values present. |

...