| Tip |
|---|
Since version 5.0.0 Smart Checklist for Jira Server and Data Center support Custom Statuses Admin permissions are required to manage Custom Statuses |
| Table of Contents |
|---|
Manage statuses
Navigate to Admin Console → Manage Apps → Smart Checklist → Settings → Statuses
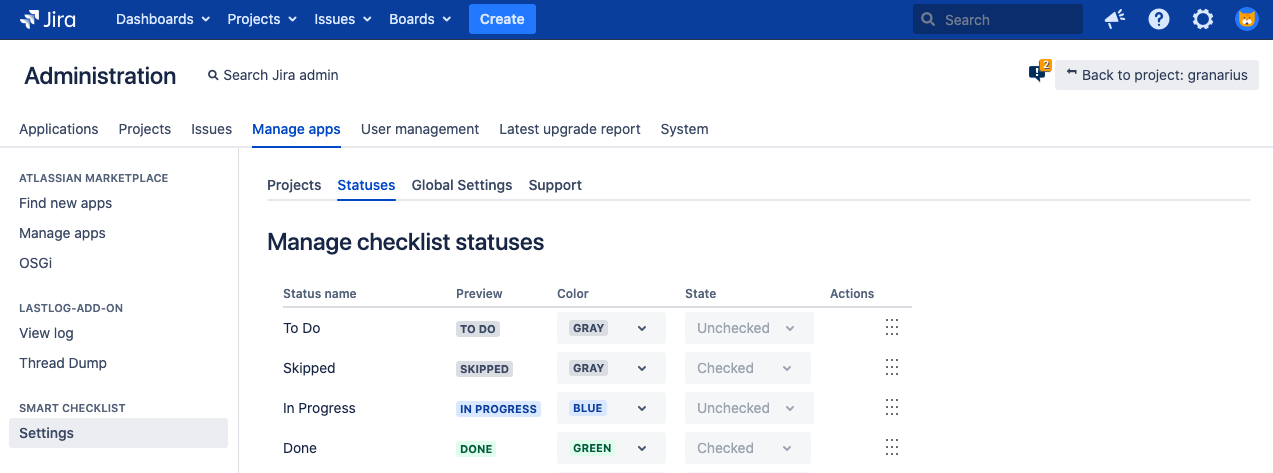
There are 4 default static statuses available in appropriate states: “To Do” (unchecked), “Skipped” (checked), “In Progress” (checked), “Done” (checked)
You can change status color and order. You can’t change “State” of default status.
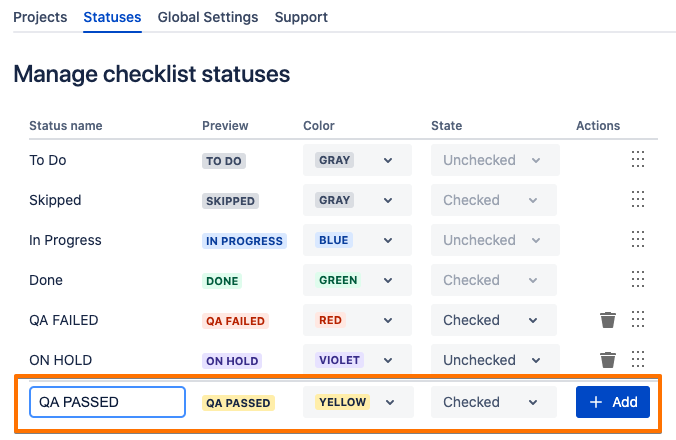
Create a new custom status
Below the statuses list enter a new status Name, choose Color, State and click “+ Add”
Note: the name is limited with 20 characters.

| Info |
|---|
You can’t rename custom status once it’s added. You’ll need to remove a status and add a new one. |
Remove status
To remove custom status - click “Trash bin” icon near the status state.
If no checklist items assigned to that status - it’ll be removed immediately.
If some checklist items contains that status - you’ll get a warning:

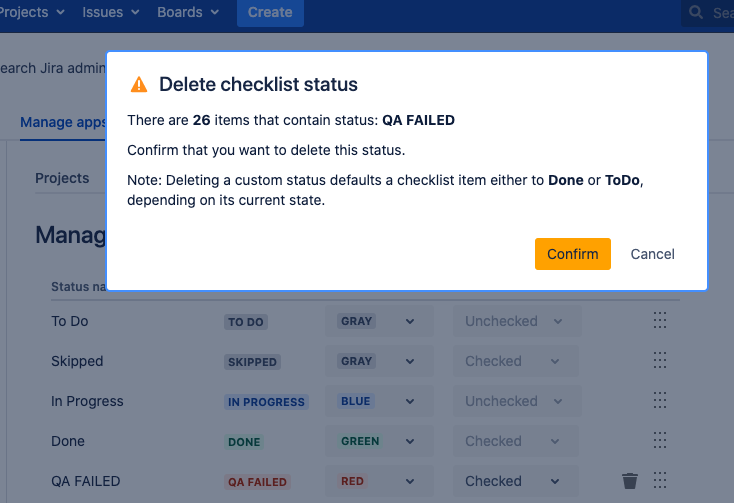
Once confirmed - status will be removed from the statuses list and all checklist items will be reassigned to the default statuses based on the following rule:
if the removed status had “Checked” state - checklist items will be set to “Done” status
if the removed status had “Unchecked” state - checklist items will be set to “To Do” status
Reorder status
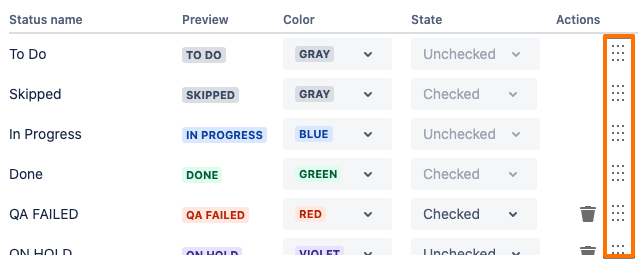

Hold the draggable icon and reorder statuses in the way how you’d like them to be represented in checklist UI
Choose status display style
Go to Manage Apps → Smart Checklist → Settings → Global Settings
Choose one style from 3 available.


Available options:
All statuses - statuses are always shown to the right of checklist items
Specific statuses - arrow dropdown and only custom statuses to be shown near checkboxes
Checkboxes only - no statuses are shown, only checkboxes
Change status in checklist UI
You can set a custom status for the checklist item via addon-ui depending on chosen global setting for statuses display.
Either on the right side of the checklist item based on “All statuses” setting

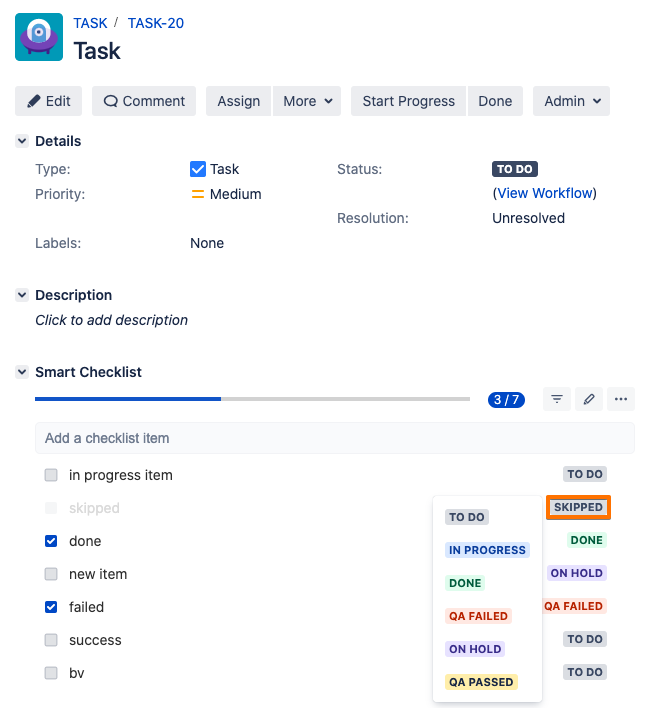
or based on “Specific Statuses” setting

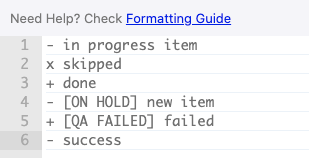
Custom status in RAW text format
Custom statuses are represented as [statusname] following the state sign.
Example
Unchecked ON HOLD item would be accessed in Full-screen editor or “Checklists” custom fields as
| Code Block |
|---|
- [ON HOLD] item with Unchecked state - [IN QA] item that is IN QA status with Unchecked state + [QA FAILED] item that has QA FAILED state Checked state |
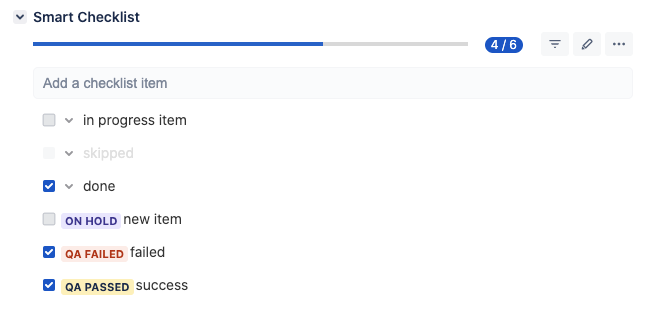
Example based on the previously viewed checklist: