| Tip |
|---|
Import checklists from My ToDo or Elements Checklist into Smart Checklist is available starting from version v6.6.0 |
How it works:
Navigate to Administration → Manage apps → Smart Checklist Settings.
Click on the "Import Checklists" tab.
Select an app to import from the list:
My ToDo;
Elements Checklist.
Click on the first tab link that redirects you to the "Projects" tab.
Toggle Smart Checklist on for the projects for which the import needs to be done.
Come back to the "Import Checklists" tab.
Select an app to import from the list one more time (My ToDo/Elements Checklist)
Choose one option to import:
Override existing Smart Checklist items - will replace checklist items that you already have in Smart Checklist with the ones from another app.
Append to existing Smart Checklist items - will add checklist items from another app to the bottom of the checklist that you already have.
Add to issues with empty Smart Checklists data only - will run import only for the issues where Smart Checklist is empty. Checklists from the other app will be added.
Click "Run import". The import will start.
You will see the progress bar for the import. The importing process will take some time.
Once it is completed, the date and time of the last import will be displayed. A message with the number of successfully/not migrated checklists will be shown. Additionally, you'll see a link to the detailed log that could be downloaded.
...
If the source plugin is not installed on the instance you will see this option as grey with a “not installed” tag and it will not be possible to select it from the list.
...
Migration using API
There is also an option to run the import from another app on a project basis. It can be inconvenient for users to ask the admin to enable/disable all other projects on the settings page, so there is a possibility to run project migration by project admin when it is needed. It can be done using the REST API endpoint.
...
POST /rest/railsware/1.0/migration
Body parameters (application/json) - list of JSON objects:
migrationOption: string
migrationType: string
projectIds: number (optional)
Example
Run migration from Elements Checklist app to Smart Checklist with override option for 2 projects:
| Code Block |
|---|
{
    "migrationOption": "OVERRIDE",
    "migrationType": "ELEMENTS",
    "projectIds": [11001, 10900]
} |
Formatting
You can find the direct formatting conversions that will be applied to checklists during import in this table:
Formatting types | Description | Displayed in Smart Checklist | ||||||
|---|---|---|---|---|---|---|---|---|
Import from My ToDo | ||||||||
Statuses
|
| 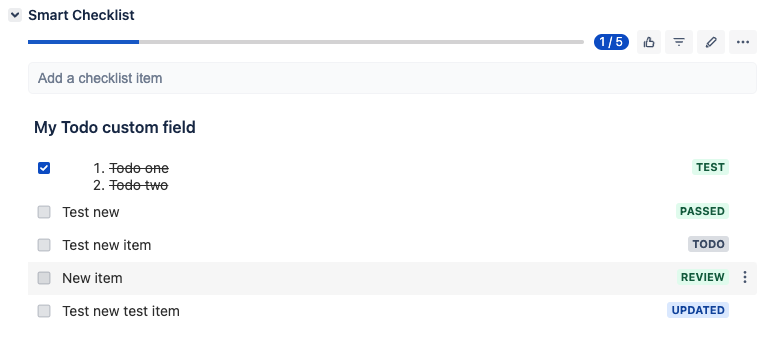 | ||||||
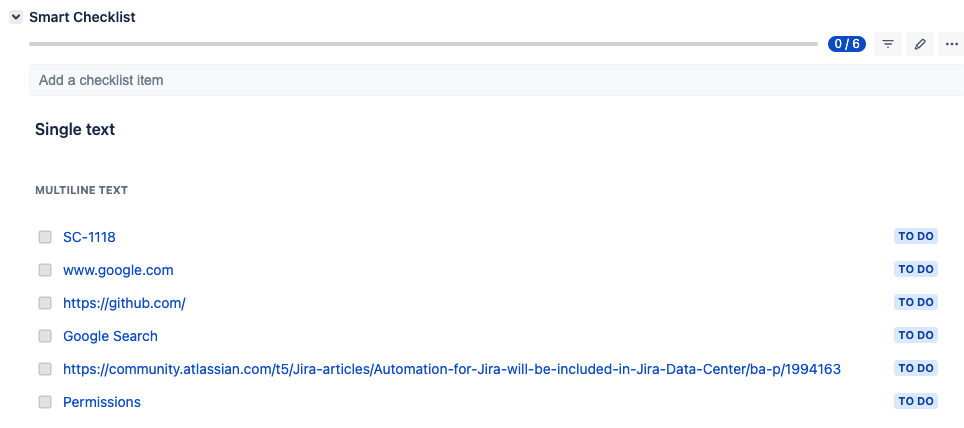
Links 🔗 |
| 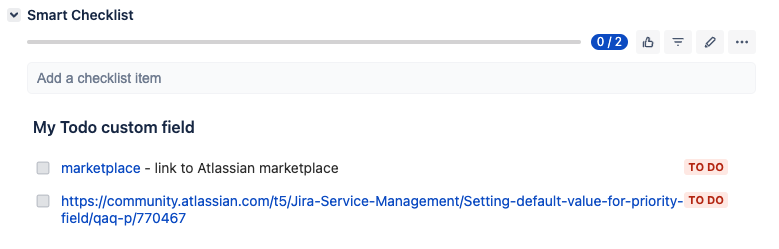
| ||||||
User mention 👤 |
| 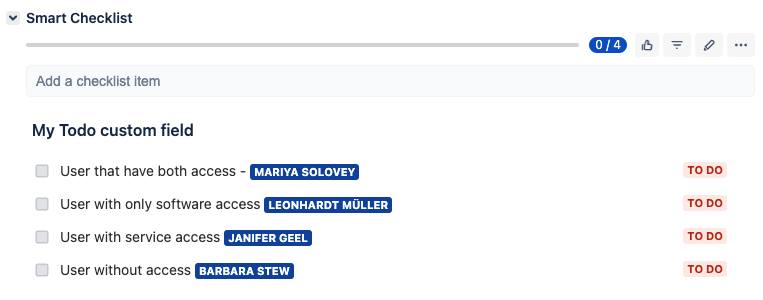 | ||||||
Date 📆 |
| 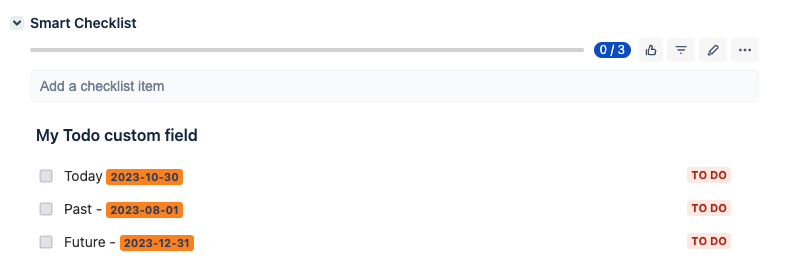 | ||||||
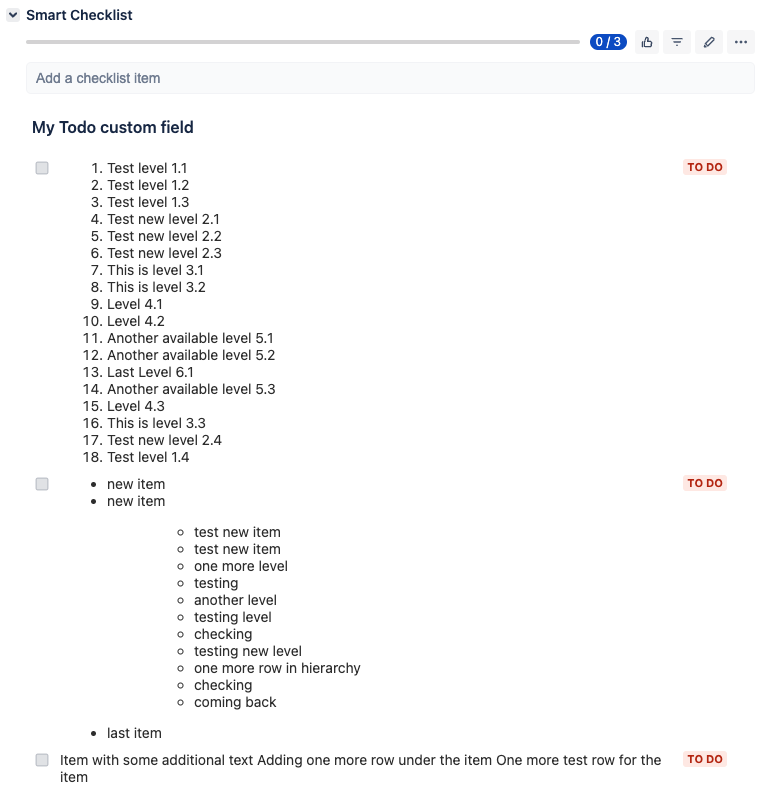
Numbered/bullet point hierarchical lists 📜 |
|  | ||||||
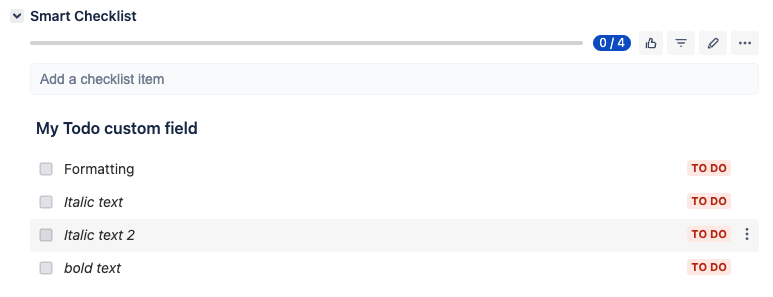
Text Formatting 🔤 |
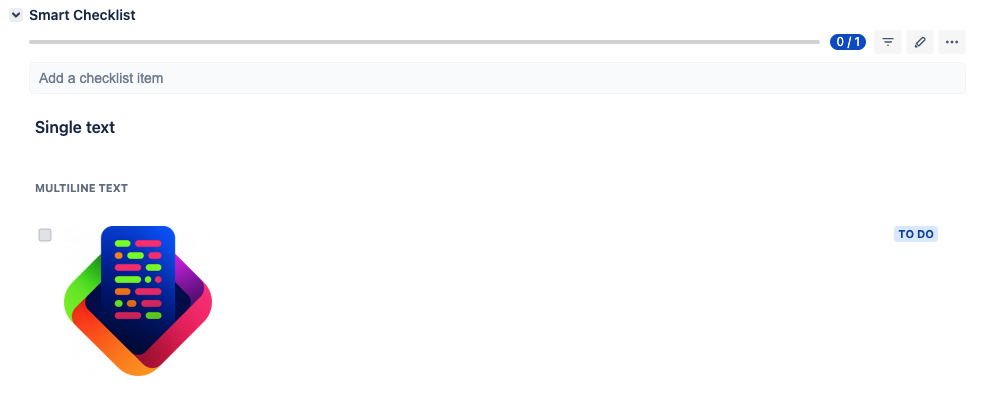
|  | ||||||
Mandatory items (flagged items) ‼️ |
| |||||||
Import from Elements Checklist | ||||||||
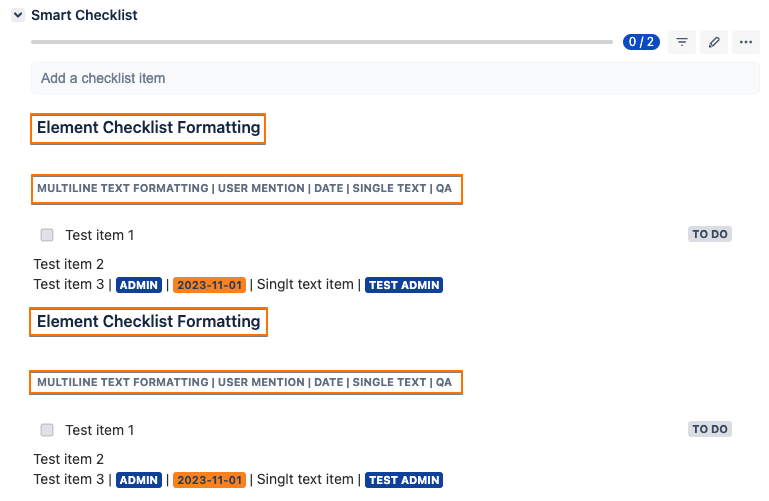
Multiple panels (checklists) 🔢 |
|  | ||||||
Separators 📏 |
|  | ||||||
Blockquotes |
| 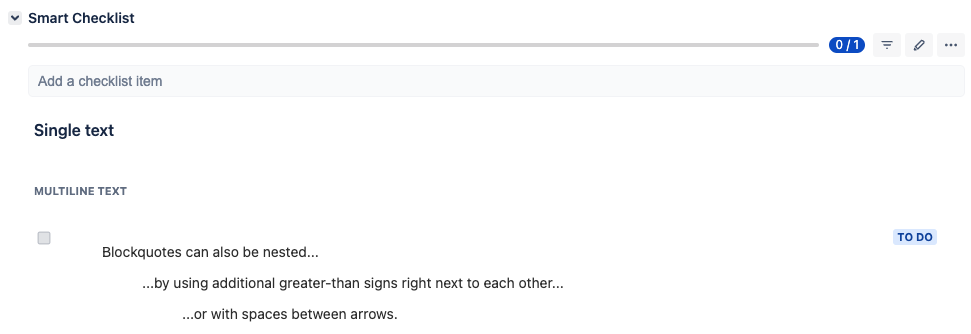 | ||||||
Lists (Ordered/Unordered) 📝 |
| 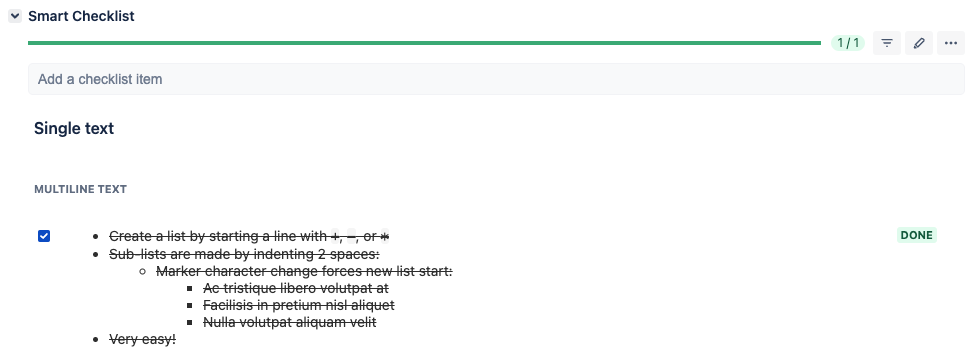  | ||||||
Tables 📊 |
| 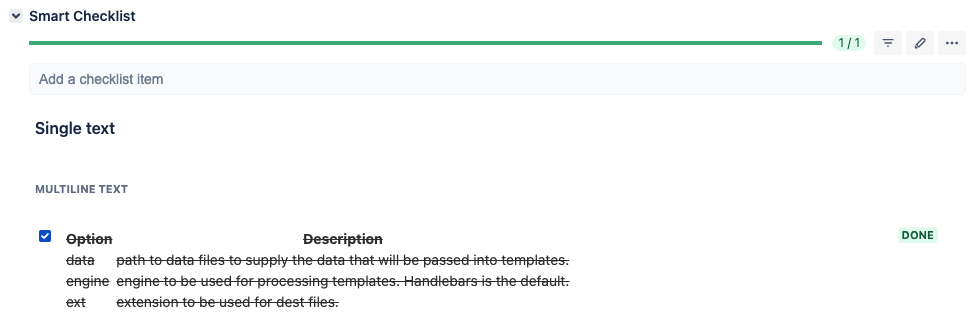 | ||||||
Links 🔗 |
|  | ||||||
Images |
|  | ||||||
Text Formatting 🔤 |
| 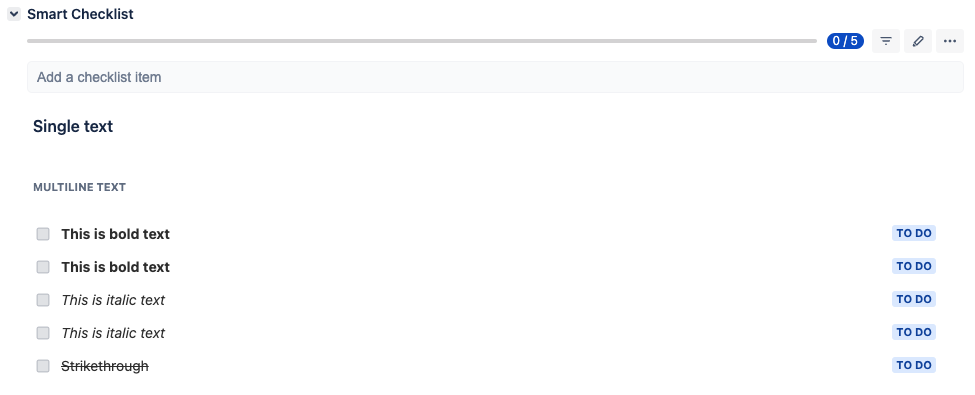 | ||||||
Headers |
| 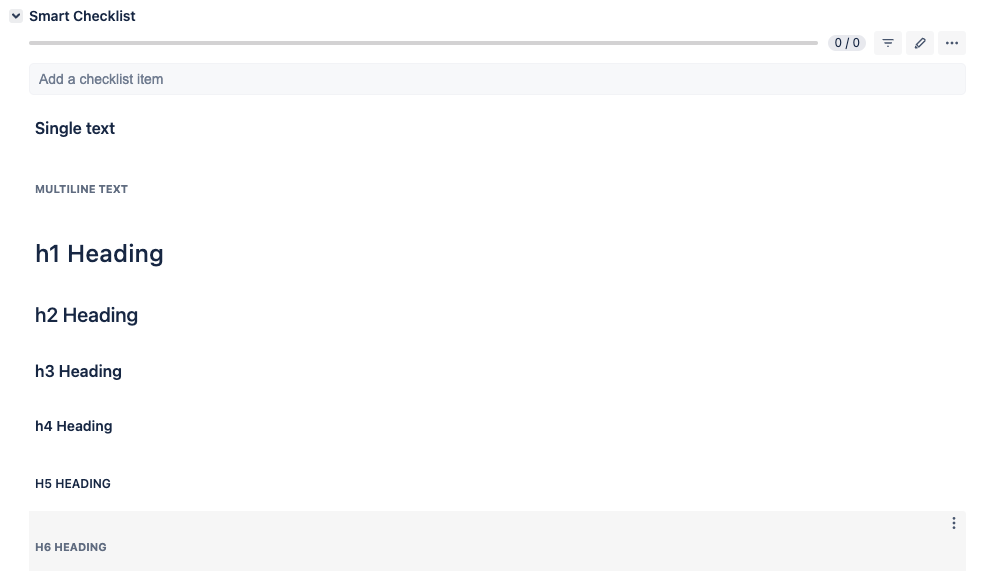 | ||||||
Formulas |
| 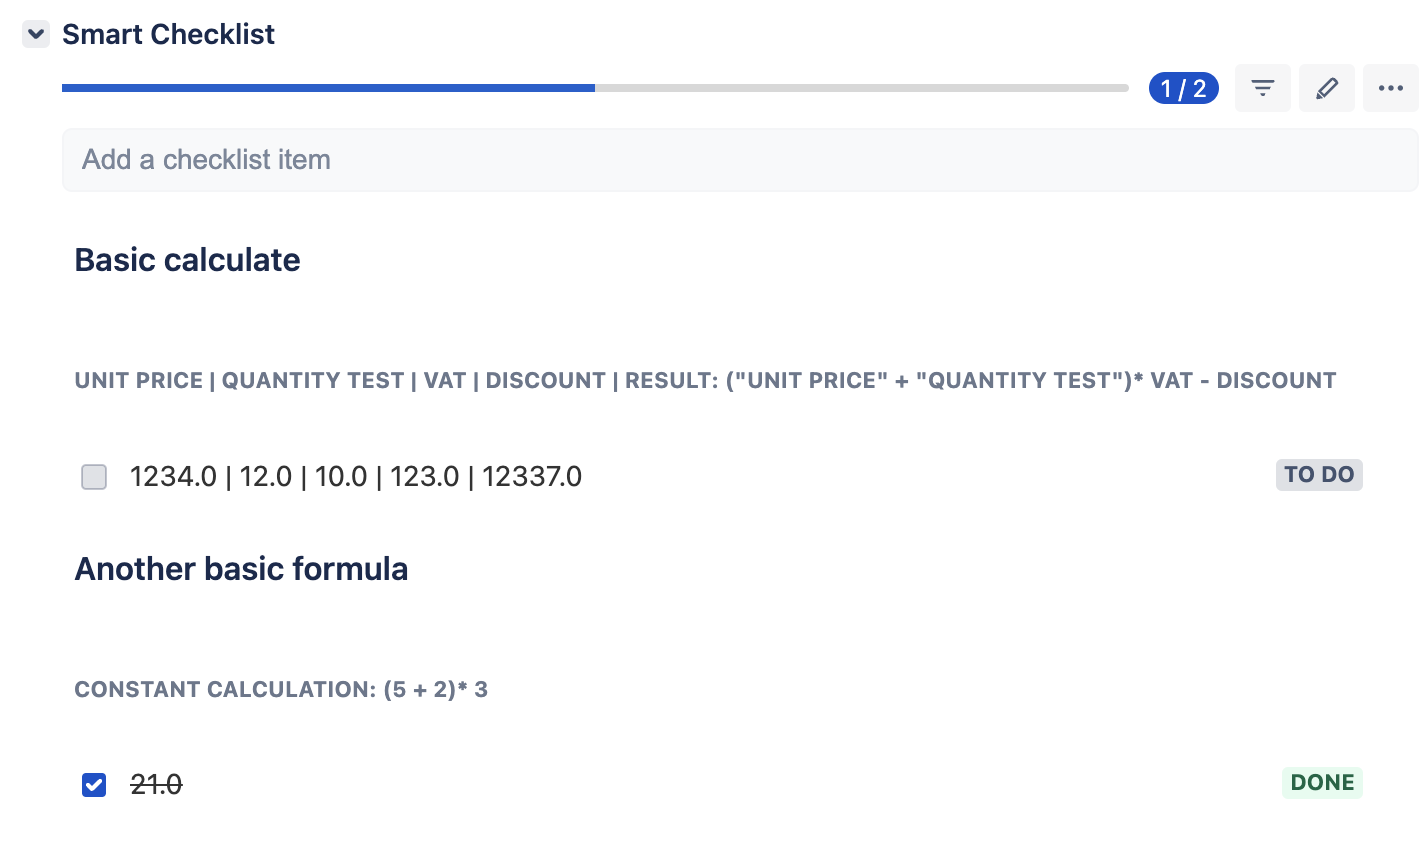 | ||||||
Files |
| 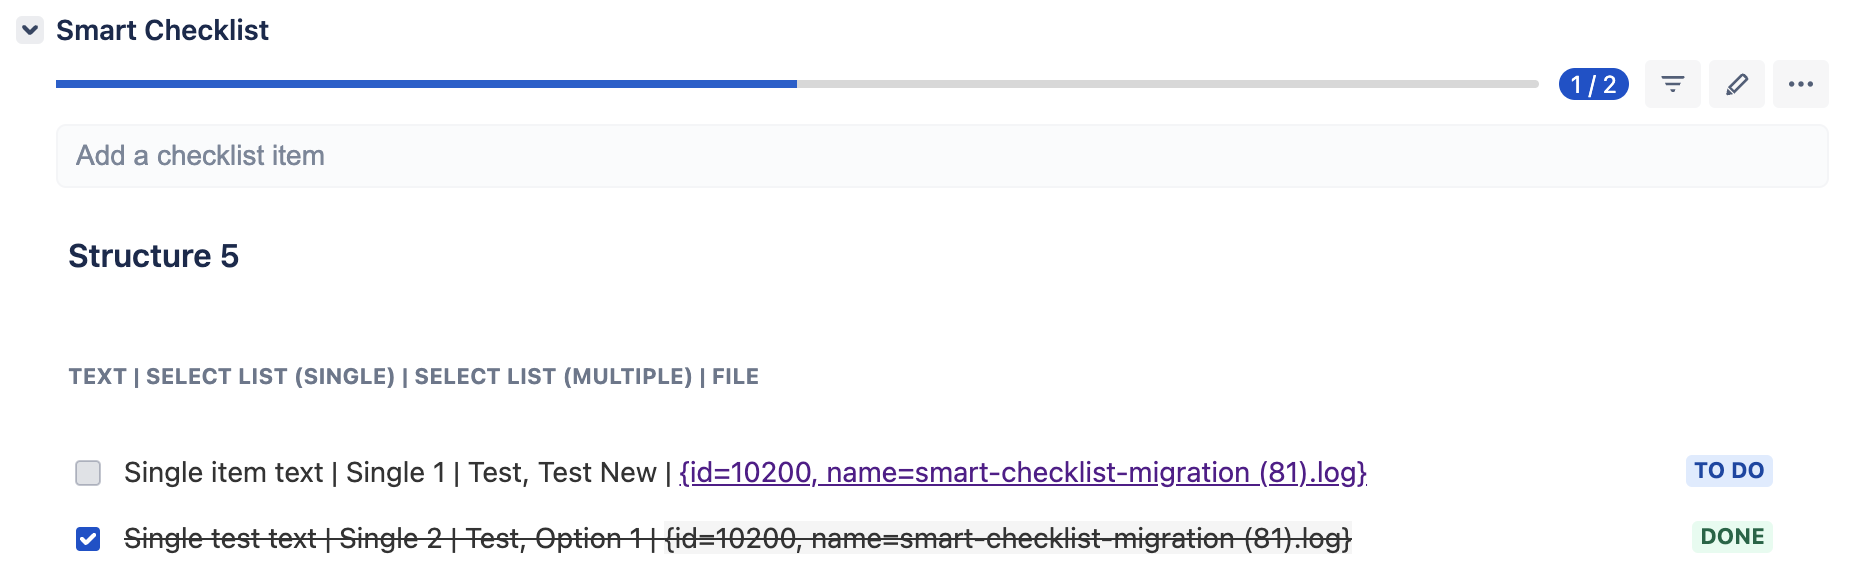 | ||||||
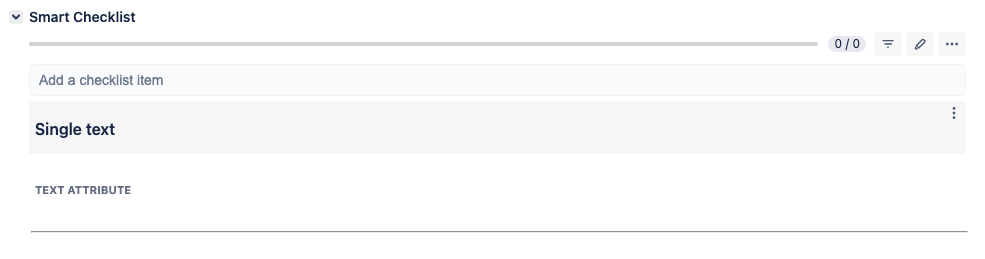
Attribute types
Elements Checklist in its panels can have a structure with different attribute types.
...