| Tip |
|---|
Why do I need the "Checklists" custom field? You may benefit from the additional functionality of the Smart Checklist add-on. Read more. |
| Table of Contents |
|---|
How to add "Checklists" custom field
| Warning |
|---|
You should have administrator rights. |
| Note |
|---|
Enabling the "Checklists" custom field may increase the number of email notifications sent by Jira. |
| Note |
Make sure you are aware of the general principles of Custom Fields and verified JIRA guide |
General Flow. Configure your Jira instance
Log in as a user with the JIRA Administrators global permission.
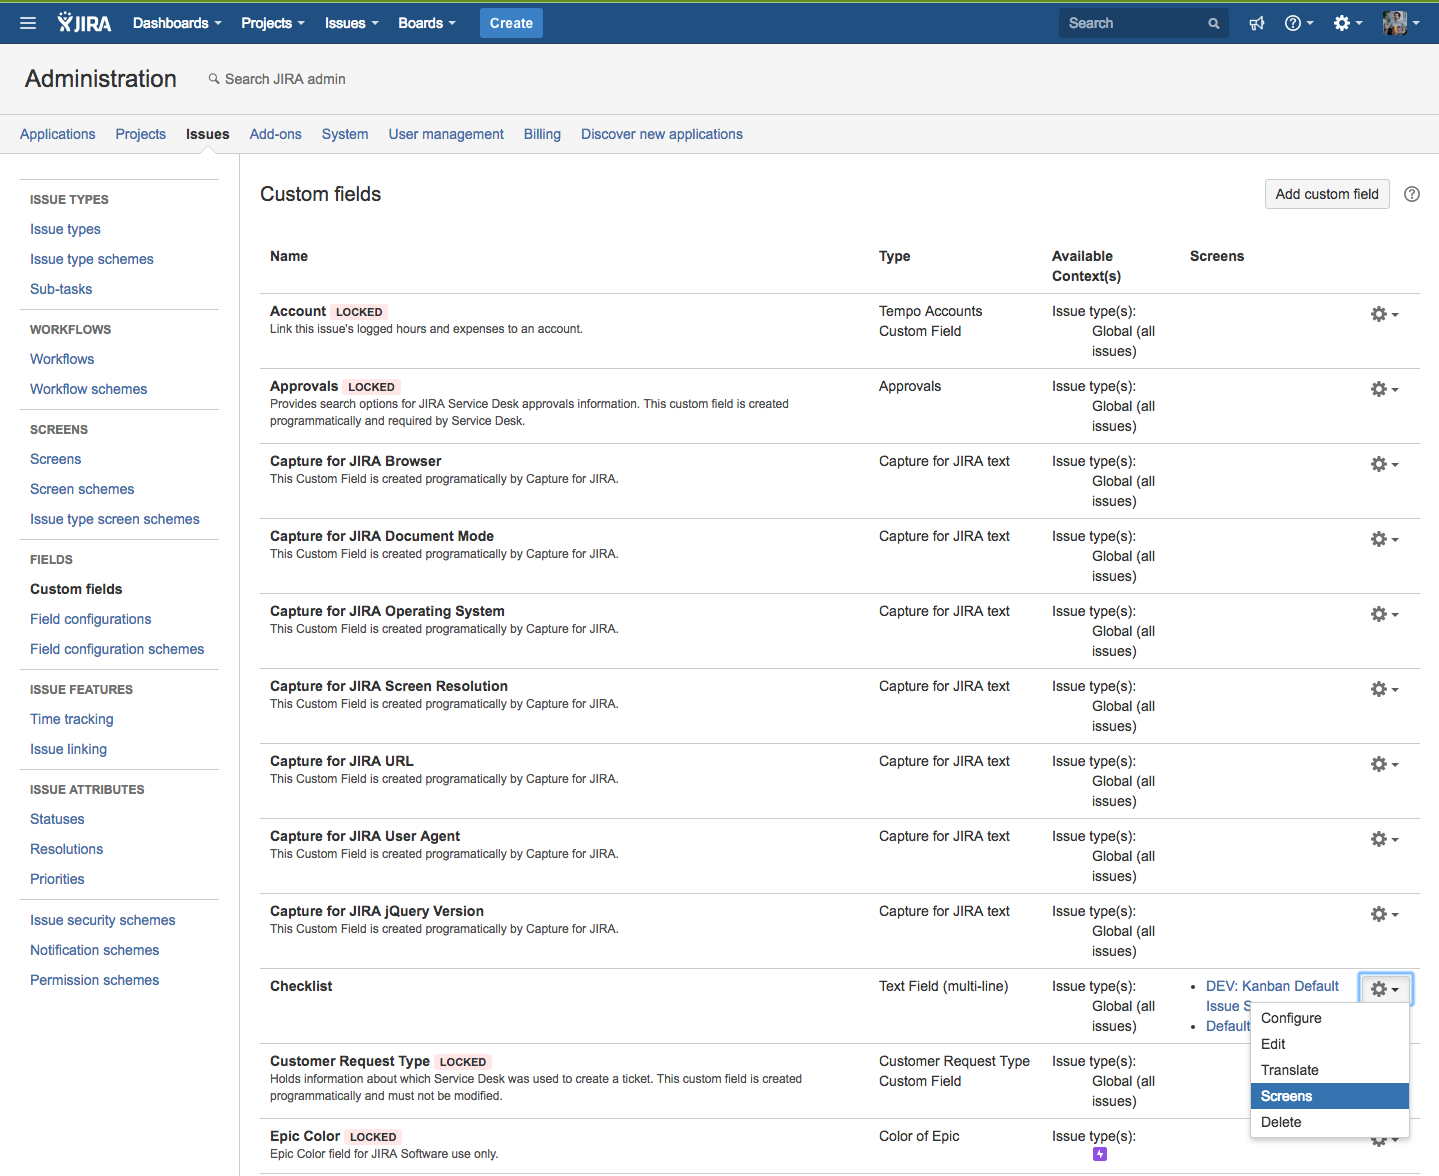
Choose the cog icon
 at the top right of the screen, then choose Issues. Select Fields > Custom Fields to open the 'Custom Fields' page.
 Keyboard shortcut: g + g + start typing custom fields
Click the Add Custom Field button to open the Create Custom Field: Choose the field type (Step 1 of 2) page.
 Select the Paragraph (supports rich text) type (previously Text, Multi-Line type)
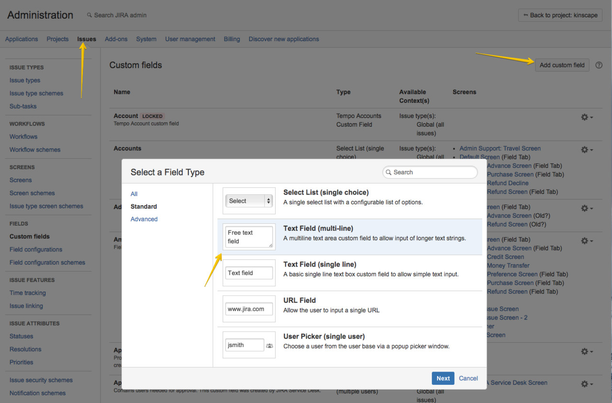
- Set name to "Checklists". Make sure the name starts with the capital "C" and ends with the lowercase "s"
Click the Next button to open the Create Custom Field - Details (Step 2 of 2) page.
You will receive an "Associate field Checklist to screens" dialog
if you happen to skip this step or want to get back to Jira Screens set up a bit later
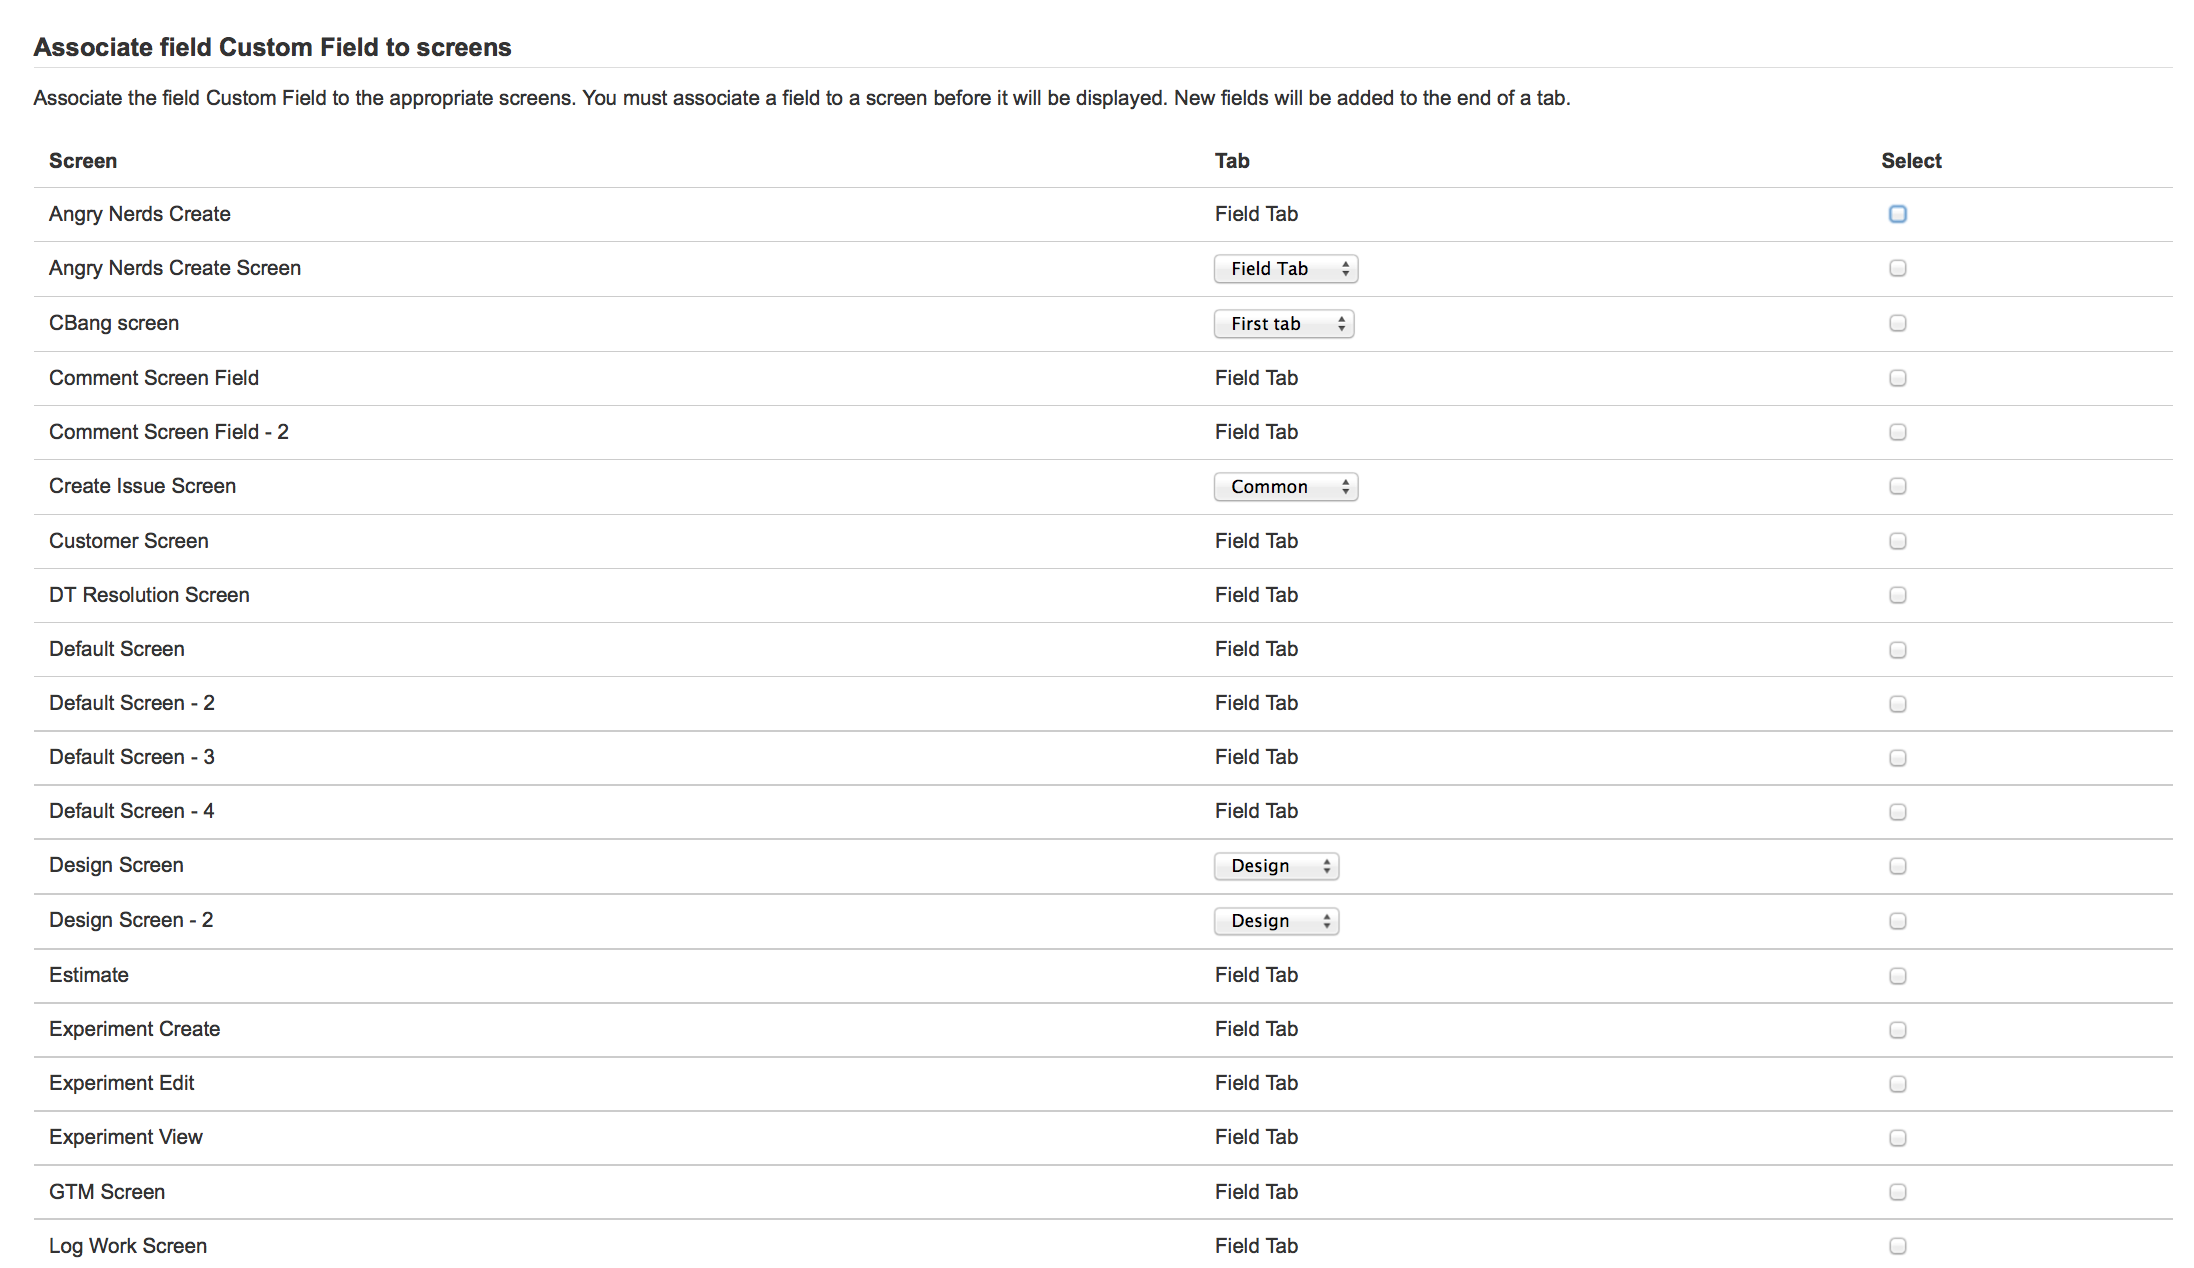
Associate all the right screens you want to see the default Jira Checklist multi-line text editor
if you are new to the Jira Screens setup and just want to start using Checklist >> just select all to be sure
if you have just one Jira Screens for all your actions >> just select that one screen
if you have an advanced Jira Screens setup
Click "Update"
Enjoy your Smart Checklist!
| Note |
|---|
You must select all your EDIT Jira Screens for all the projects you want Checklist to work |
Setting up Checklist Jira Screens later (after adding the field)
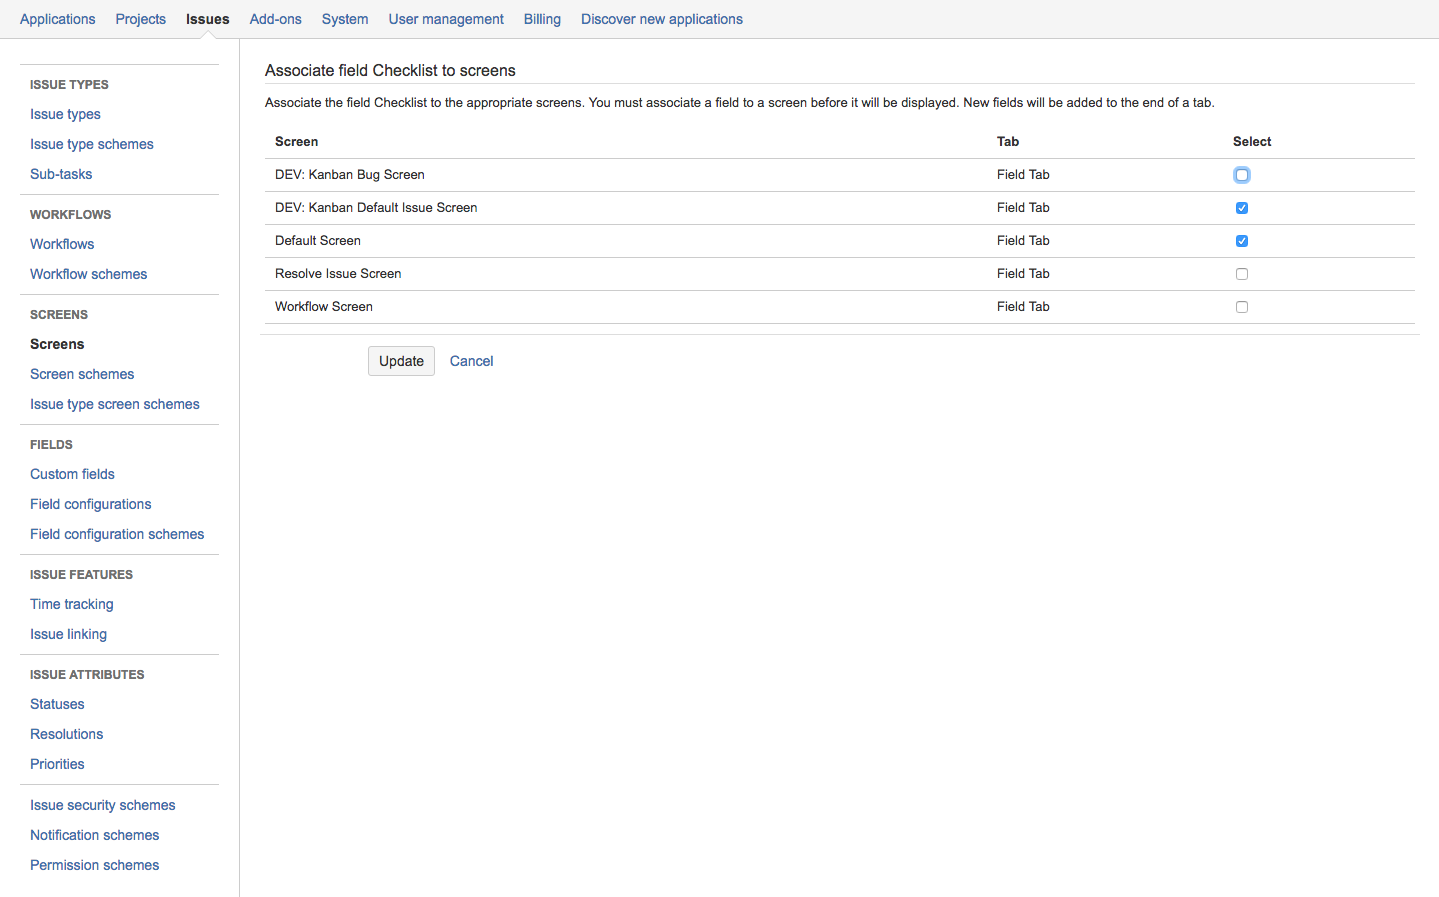
Go to Custom Fields. See steps (1) and (2) above
Find the "Checklists" field and go to "Screens" under the field settings menu (under the gear icon)
Proceed with steps (6) and (7)
| Style |
|---|
.youtube-player {width:100% !important;} |
| Warning |
|---|
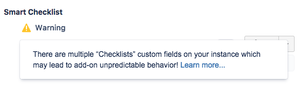
Before adding the "Checklists" custom field, make sure that no such field has already been created on your instance. Duplication of the "Checklists" field will lead to unpredictable add-on behavior. Smart Checklist will not recognize which field to use as a data storage. In case 2 or more fields are added, users will see the following message:
Solution: remove all "Checklists" duplicates. Leave only 1 field. |
How to setup "Checklists" custom field video
| Widget Connector | ||||||||||
|---|---|---|---|---|---|---|---|---|---|---|
|
| Note |
|---|
Note: Text, Multi-Line type is now changed to Paragraph (supports rich text) type |
How to hide "Checklists" field from the View Screen video
| Widget Connector | ||||||||||
|---|---|---|---|---|---|---|---|---|---|---|
|
| Warning |
|---|
Remove "Checklists" field wisely. Do it ONLY when you don't need any data that's stored there. You would need this data if you plan exporting issues with checklists. Data between Issue Properties and Custom Field is synchronized only when Smart Checklist is initialized by opening a Jira issue. This means, if you remove the field and re-add it later on, there's a risk not to have checklists from OLD Jira issues synced. |
| Insert excerpt | ||||||
|---|---|---|---|---|---|---|
|