Automation for Jira is a popular tool to get your team automated by creating additional workflows, rules and processes.
...
Set Checklist on Issue Creation
This flow can also be achieved by the built-in Templates functionality of Smart Checklist. Visit this page for guidance.
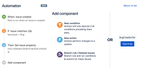
Go to Automation for Jira → Automation Rules
Click Create Rule
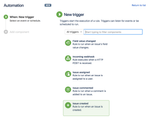
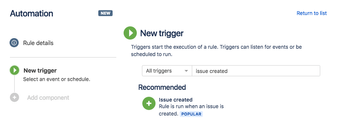
Set When: New Trigger
Choose Issue created → Save
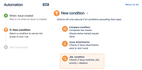
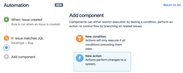
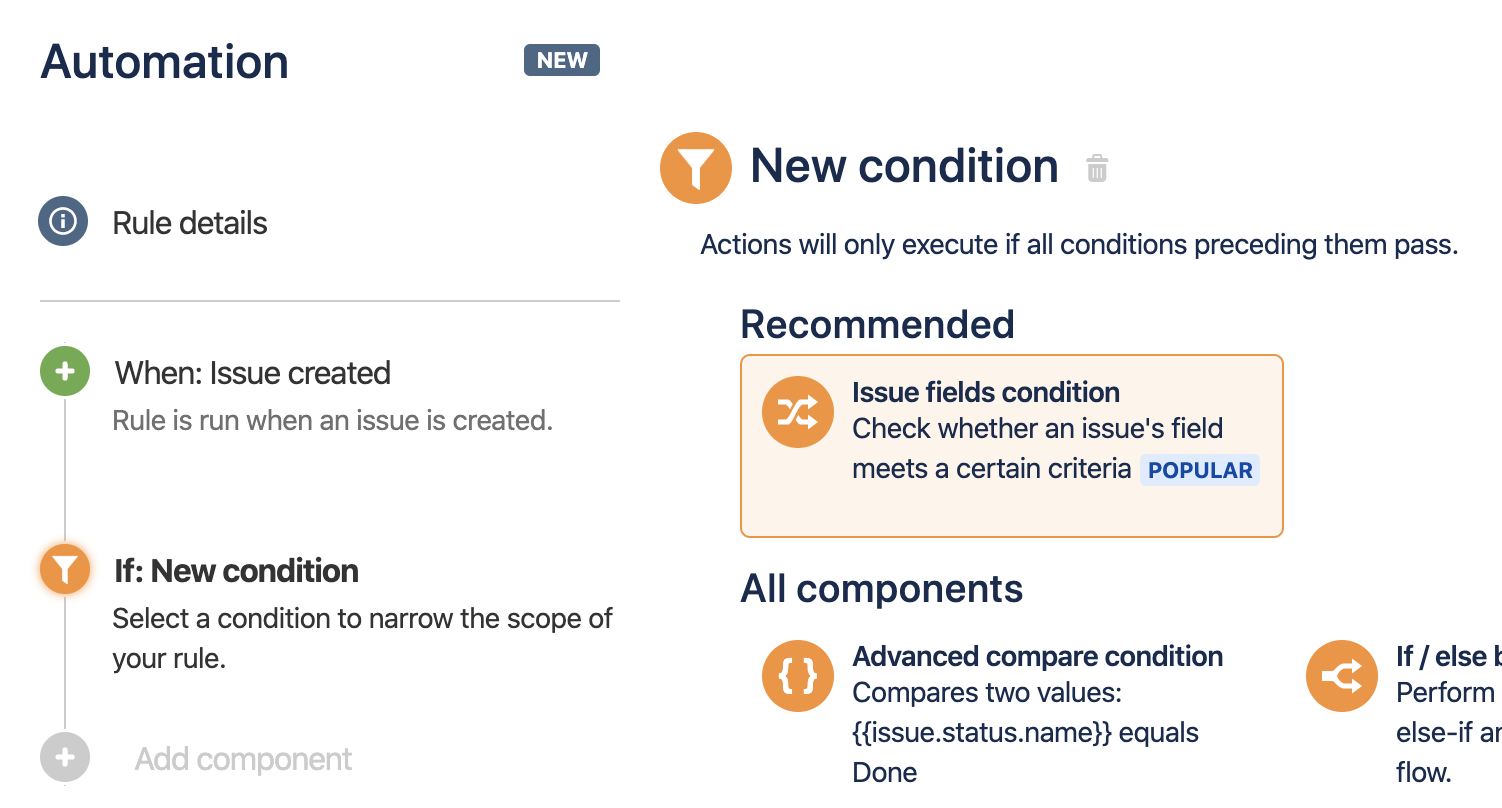
Add component New Condition
Set New Condition
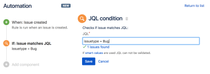
Choose JQL condition
Add filter per Issue Type
Code Block issuetype = Bug

Save Condition
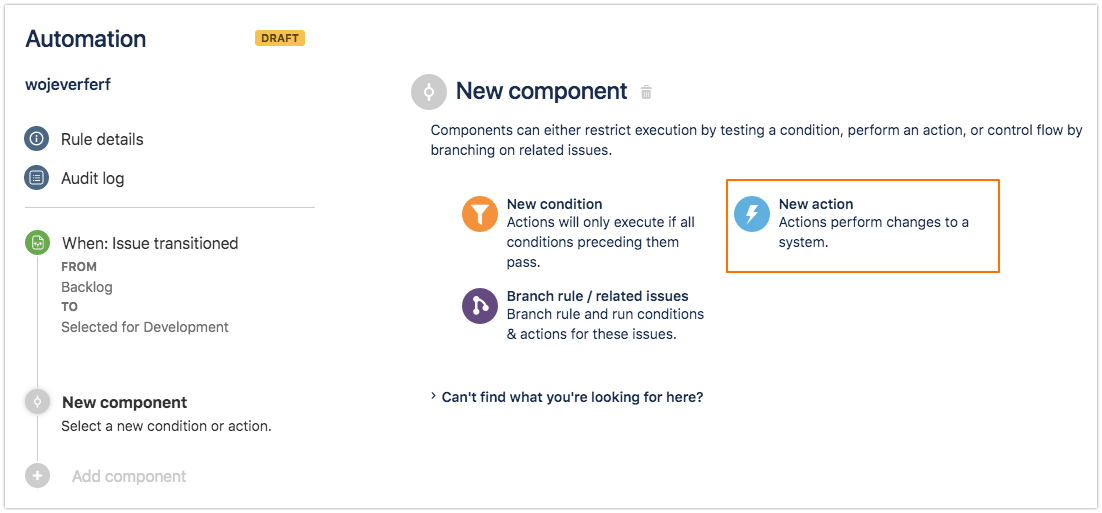
Add component New Action
Set New Action
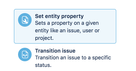
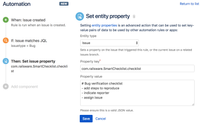
Choose Set entity property
Choose Entity type: Issue
Set Property Key
Code Block com.railsware.SmartChecklist.checklist
Add checklist template in Markdown formatting as the property value
Save Action
Save and Turn Automation On
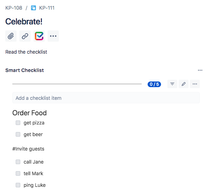
You're done! Now every time a "Bug" issue created - a proper Template will be added as a checklist.


Append Checklist Items on Issue Transition
| Warning |
|---|
Not available in next-gen projects. Please see the details here. |
| Note |
|---|
Make sure you have the "Checklists" custom field added as a Smart Checklist storage. Read "Checklists" Custom Field for set up Otherwise - only new items will be added to the "Smart Checklist" content. |
...
Go to Automation for Jira → Automation Rules
Click Create Rule
Set When: New Trigger
Choose Issue transitioned
Choose from status (e.g. Backlog) and to status (e.g. Selected for Development)
Save
Add component New Action
Set New Action
Choose Set entity property
Choose Entity type: Issue
Set Property Key
Code Block com.railsware.SmartChecklist.checklist
Add checklist template in Markdown formatting as the property value and add the following in the beginning:
Code Block {{issue.fields.Checklists}}
Save Action
Save and Turn Automation On
You're done! Now every time an issue is transitioned from Backlog to Selected for Development, the proper checklist template will be appended to your issue.

Transition an issue to the next state when all the checklist items are completed
| Warning |
|---|
Not available in next-gen projects. Please see the details here. |
Make sure you have "Smart Checklist Progress" custom field enabled. Follow instructions here
Once "Smart Checklist Progress" custom field is set up - start new Automation Rule creation
Add trigger "When" Field Value is changed.
Add "Smart Checklist Progress" field and "Edit Issue" as For operator
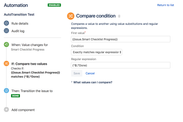
Then Add "Compare Condition" automation block
Set First Value: {{issue.Smart Checklist Progress}}
Set Condition: "Exactly match regular Expression"
Set Regular expression: (^$|.*Done)
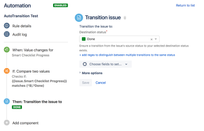
Then Add "Transition Issue" automation block
Set "Destination status", e.g. "Done"
Save the Automation Rule


...
Make sure you have the "Checklists" custom field enabled. Follow instructions here
Go to Automation rule and create new
Choose the trigger Issue created
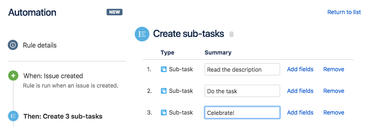
Choose the action Create sub-tasks
List subtasks you need
Click Add fields - your subtask will be converted to a separate action step
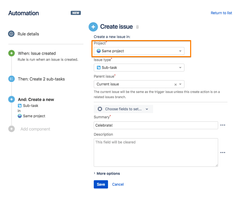
Choose Same Project to be sure the sub-task is not lost
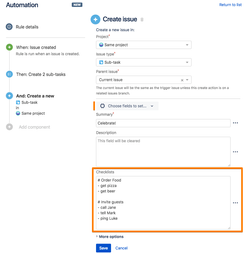
Add "Checklists" custom field from Choose fields to set
Then add checklist items using checklist Markup formatting. Check the detailed guide!
Save and publish Automation Rule
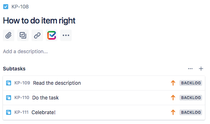
Now when you create a Jira issue new sub-tasks will be created automatically
Click on the one that contains the checklist - see it's rendered with Smart Checklist add-on


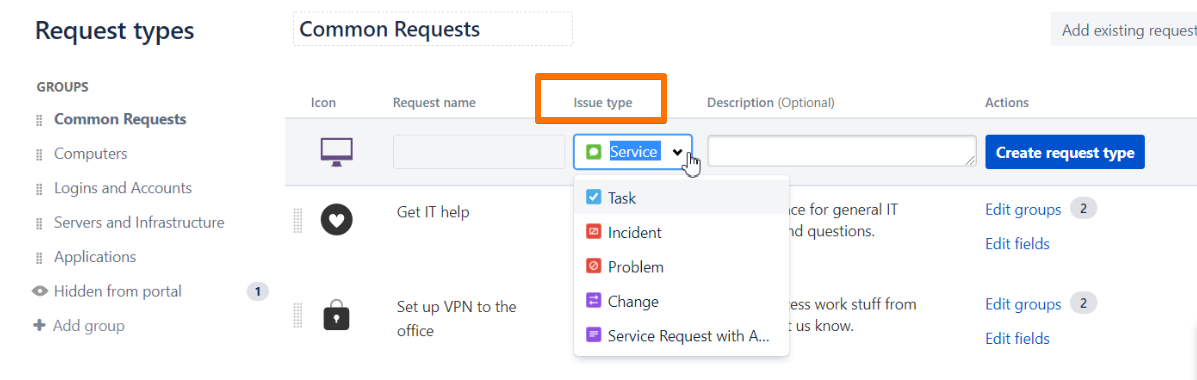
Add Checklist to Service Desk tickets for certain Request types (not a JIRA issue type)
Service Desk Request types are Jira issue types, but specific for Service Desk.
You would need to check what issue type you have for "New User Account" requests
and then create an Automation rule for this specific issue type.
E.g. If you have a Request Type called "Get IT help" and it has "Service Request" issue type:
In Automation, you would need to create a rule that would add a checklist to all the new requests of "Service Request" type
Set Trigger. When: Issue Created

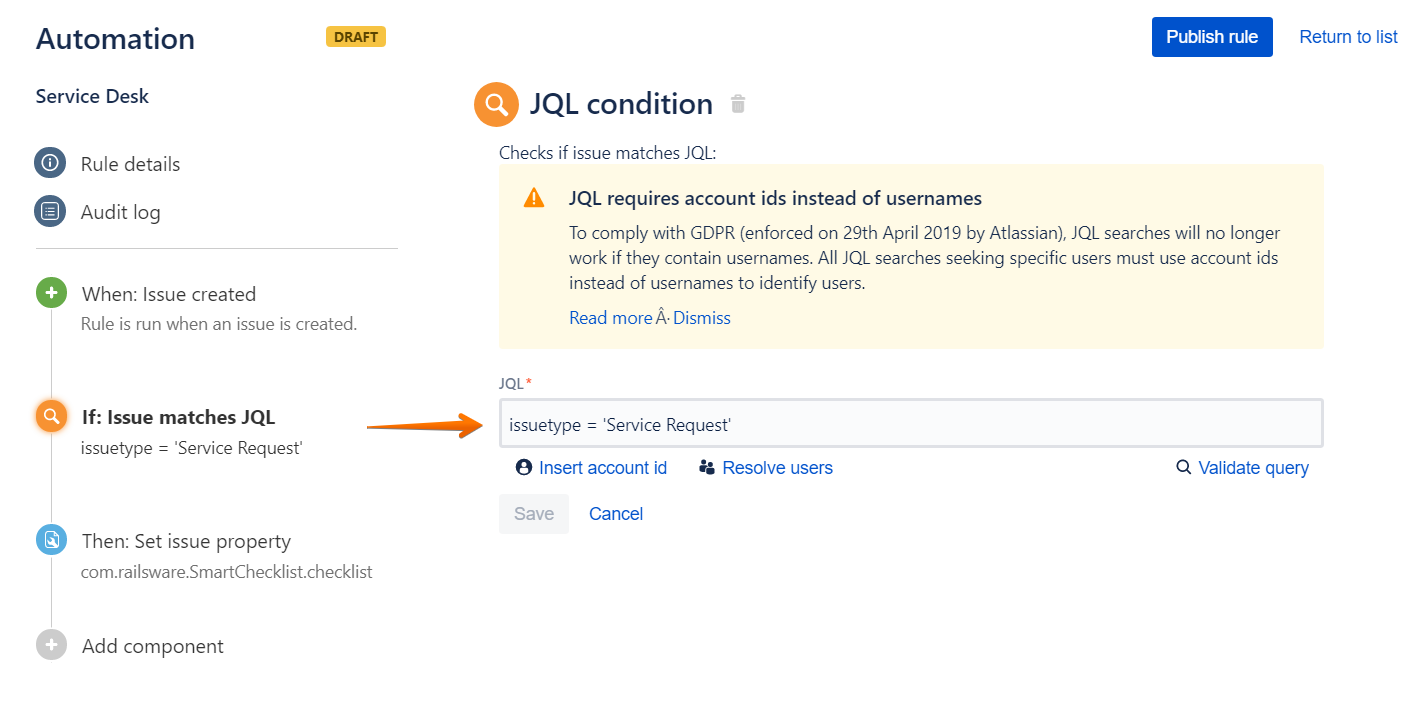
Set Condition. If: Issue matches JQL
Code Block issuetype = 'Service Request'
Set Action. Then: Set Issue Property
Code Block com.railsware.SmartChecklist.checklist
And set the value of the checklist you need


...
Go to Automation for Jira → Automation Rules
Click Create Rule
Set When: New Trigger
Choose Issue created → Save
Add component New Condition
Set New Condition
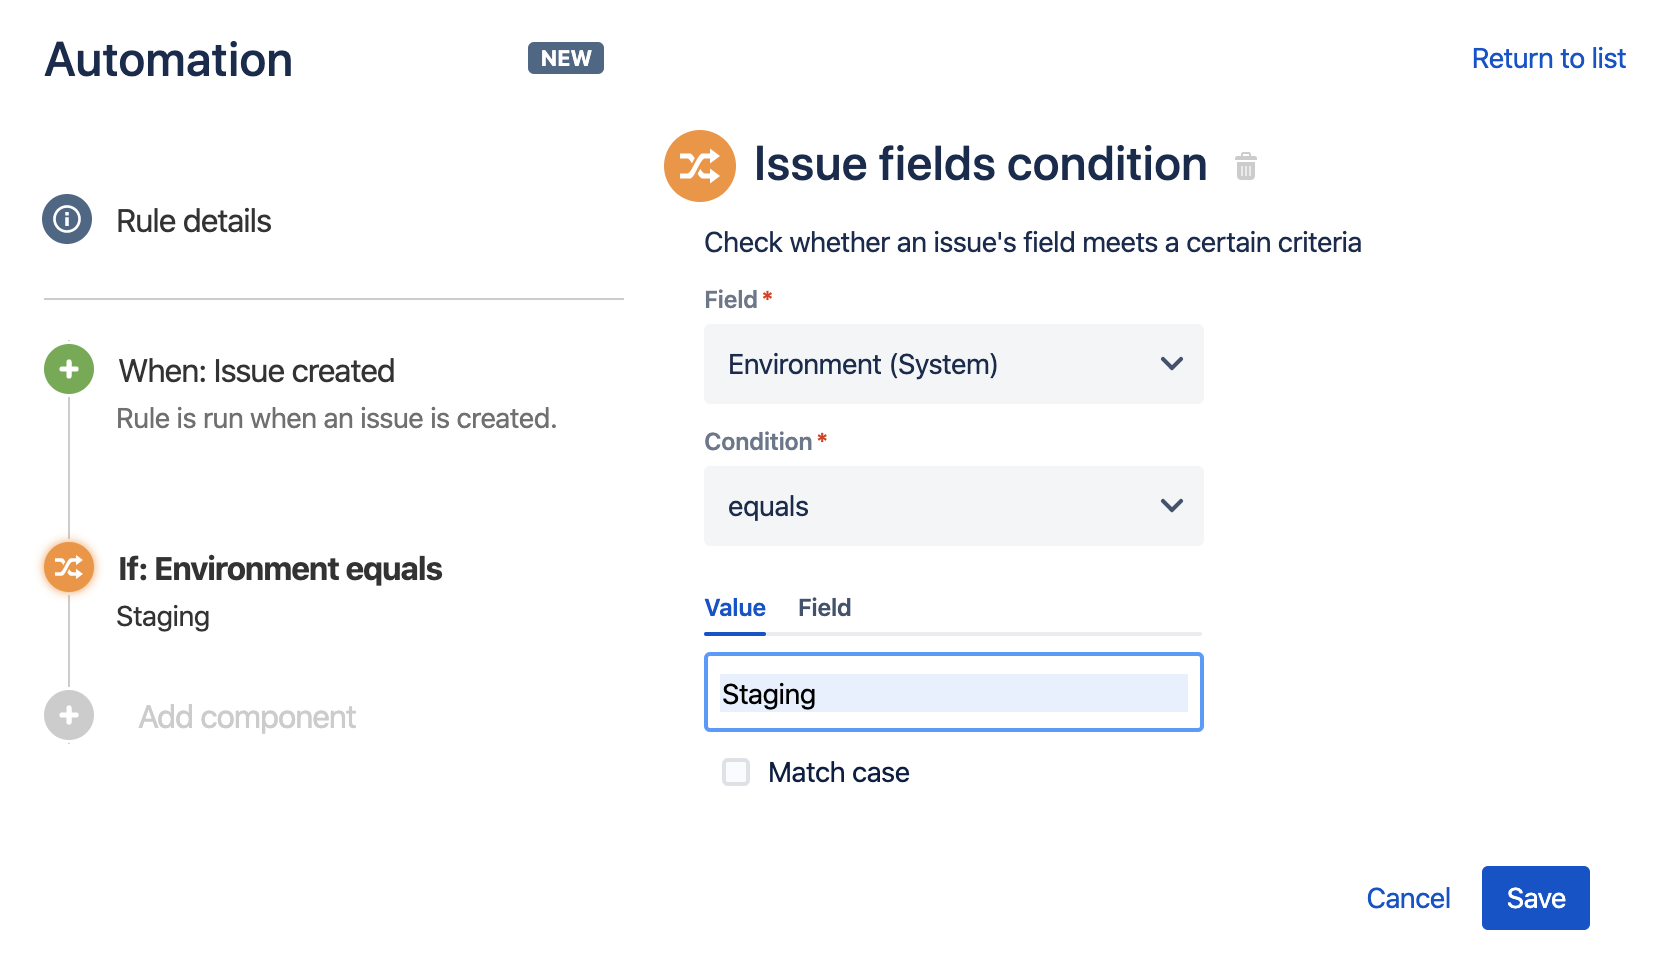
Choose Issue fields condition
Select your needed custom field
Choose the condition equals
Add the value of your custom field
Save Condition
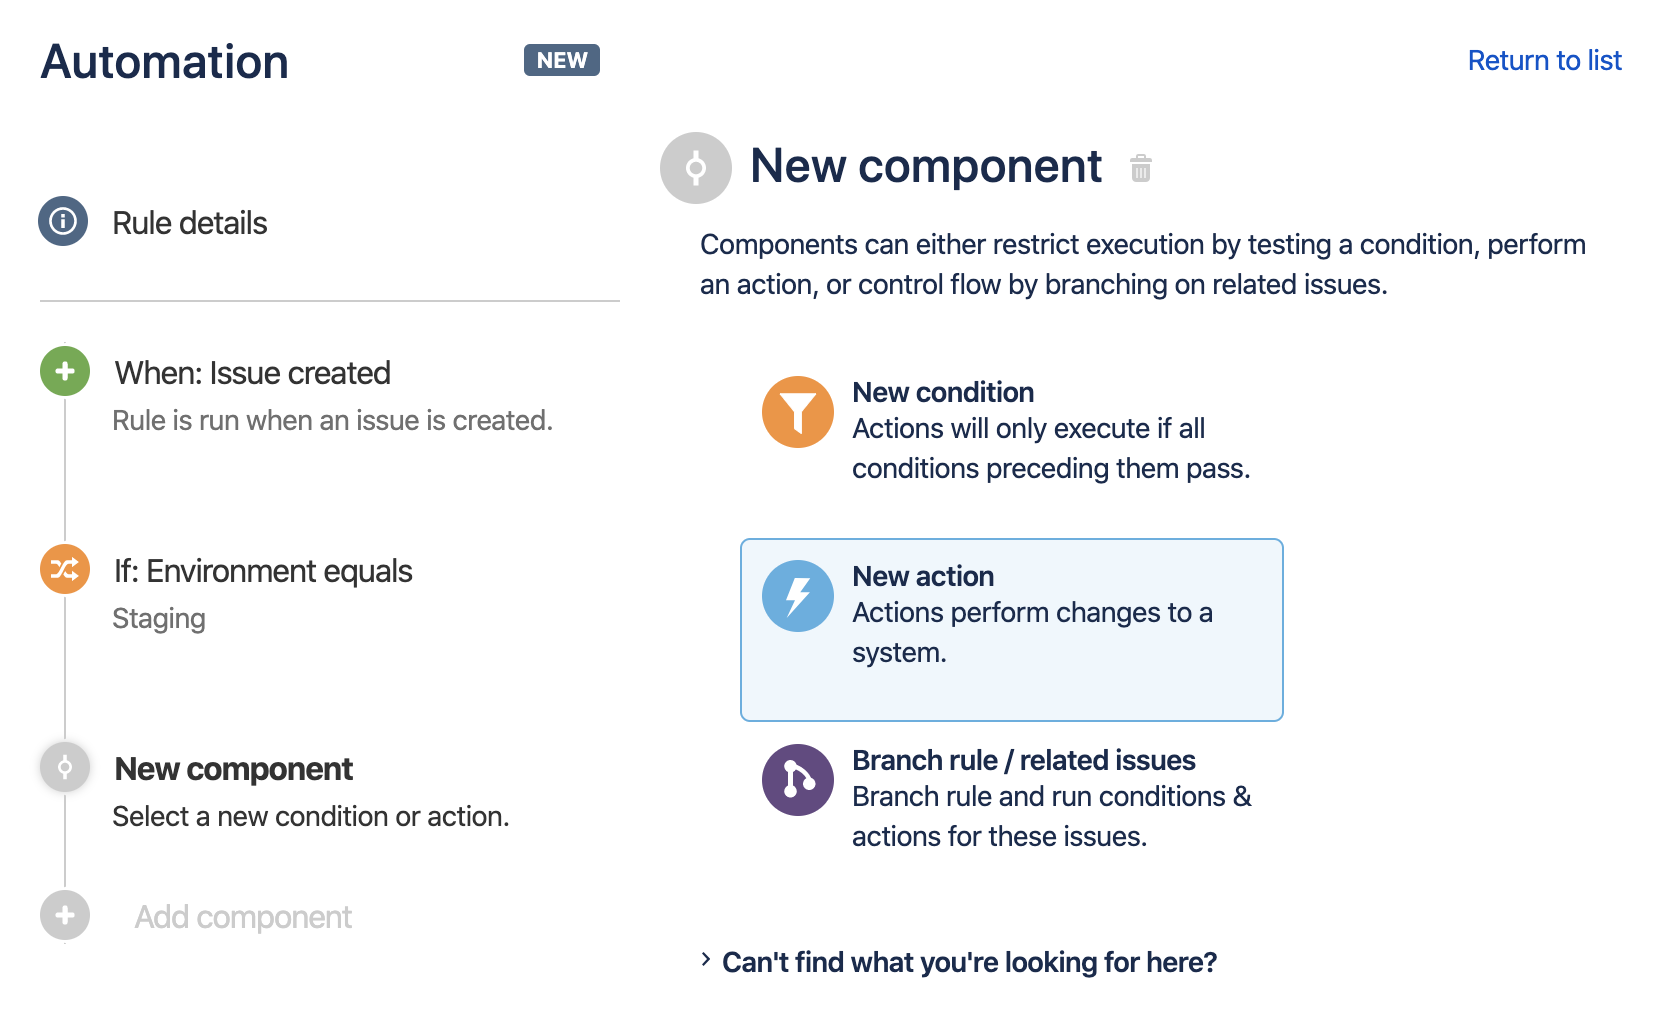
Add component New Action
Set New Action
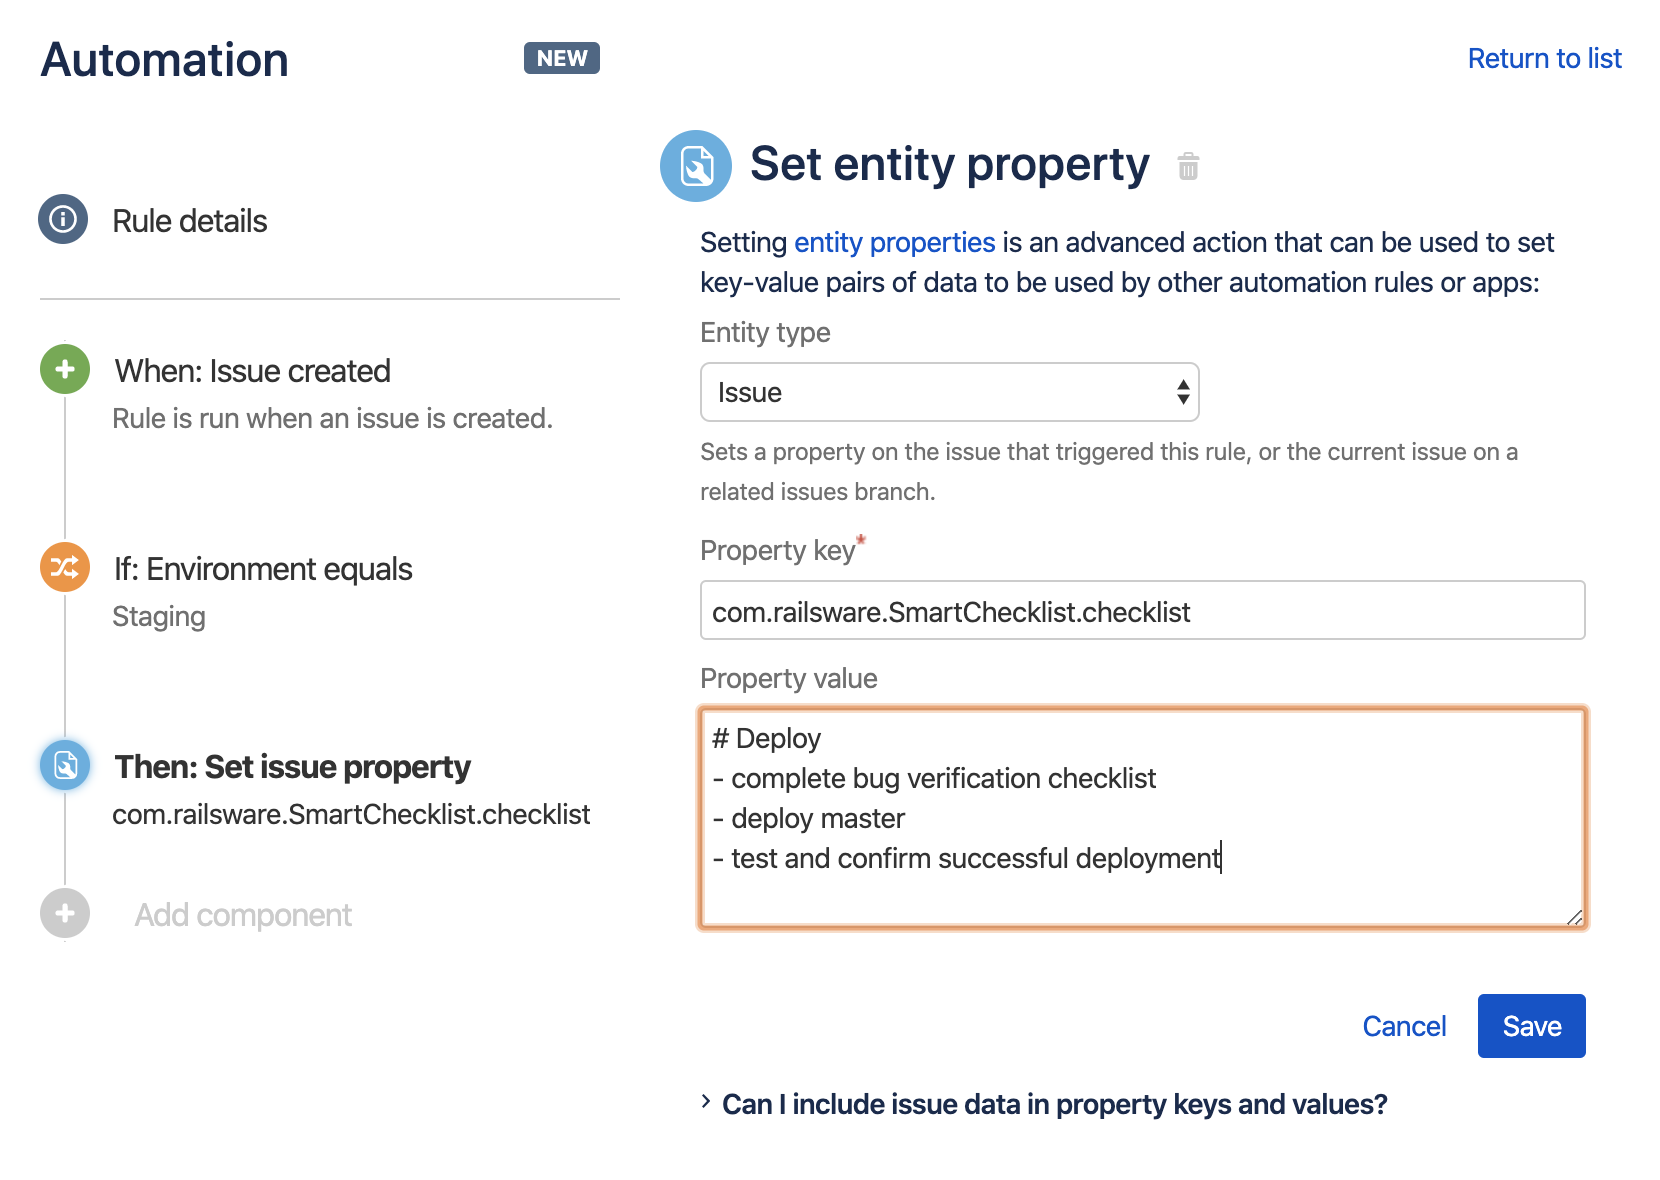
Choose Set entity property
Choose Entity type: Issue
Set Property Key
Code Block com.railsware.SmartChecklist.checklist
Add checklist template in Markdown formatting as the property value
Save Action
Save and Turn Automation On
You're done! Now every time an issue with a defined custom field value is created - a proper Template will be added as a checklist.


...