| Tip |
|---|
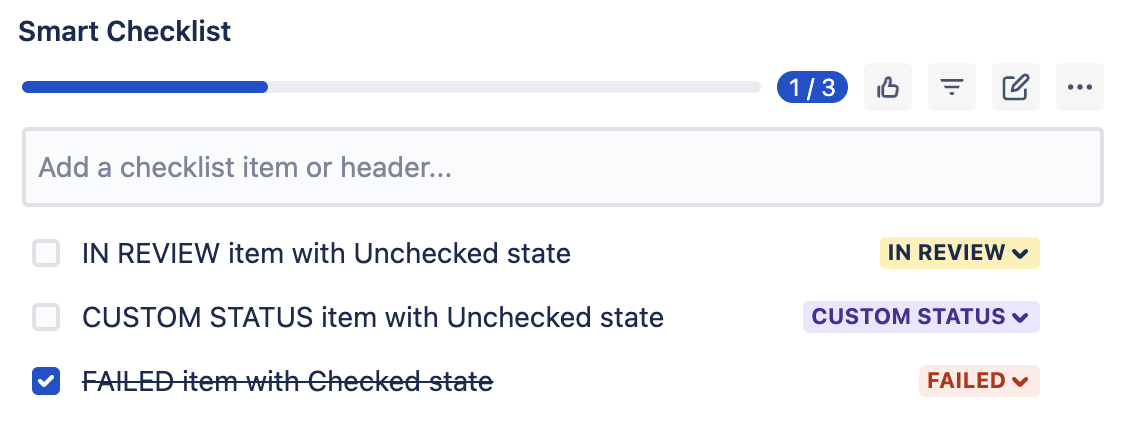
Customise your Smart Checklist with custom statuses 🚀 |
Custom statuses👇🏻
| Table of Contents |
|---|
Manage Statuses:
Navigate to Settings → Apps → Smart Checklist → Settings → Statuses
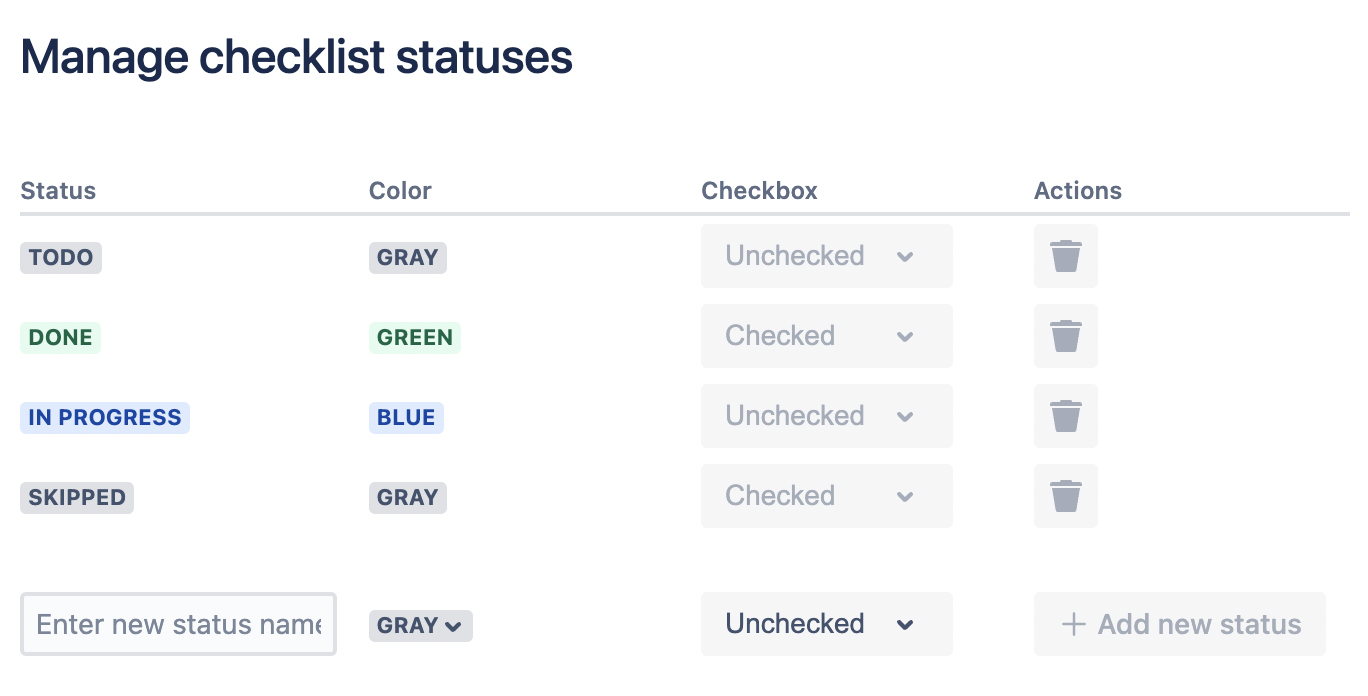
There are 4 default static statuses available in appropriate states:
(unchecked)Status title todo
(checked)Status colour Green title Done
(unchecked)Status colour Blue title In Progress
(checked)Status title Skipped
You can change the status color and order. You can’t change the “State” of default status.
Create a new Custom Status:
Below the statuses list enter a new status Name, choose color, state and click “Add new status”.
The name of custom status is limited to 50 characters.

NOTE: You can’t rename custom status once it’s added. You’ll need to remove the status
and add a new one 🙃
Remove status:
To remove custom status - click the “Trash bin” icon near the status state.
If no checklist items are assigned to that status - it’ll be removed immediately.
If some checklist items contain that status - you’ll get a warning:
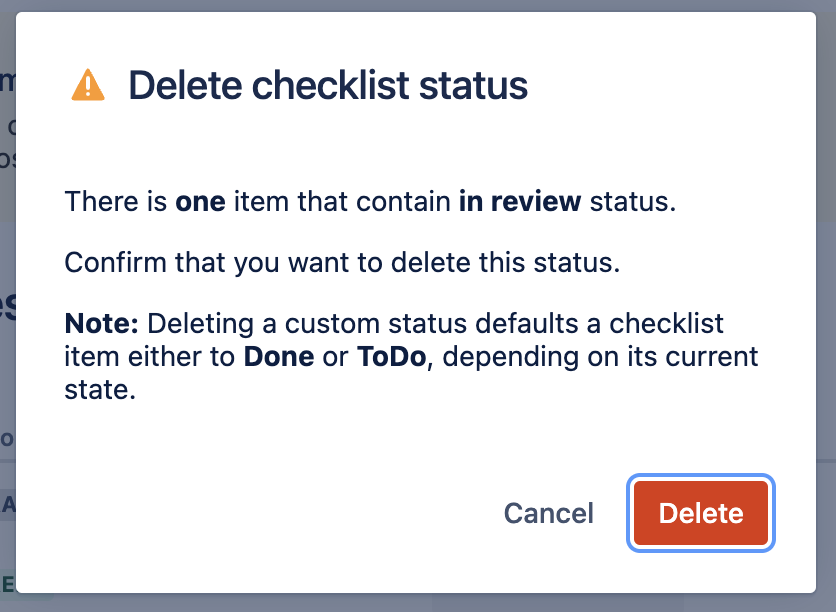
Once confirmed - status will be removed from the statuses list and all checklist items will be reassigned to the default statuses based on the following rule:
if the removed status had “Checked” state - checklist items will be set to “Done” status,
if the removed status had “Unchecked” state - checklist items will be set to “To Do” status.
| Note |
|---|
NOTE: Default statuses cannot be removed |
Reorder status:
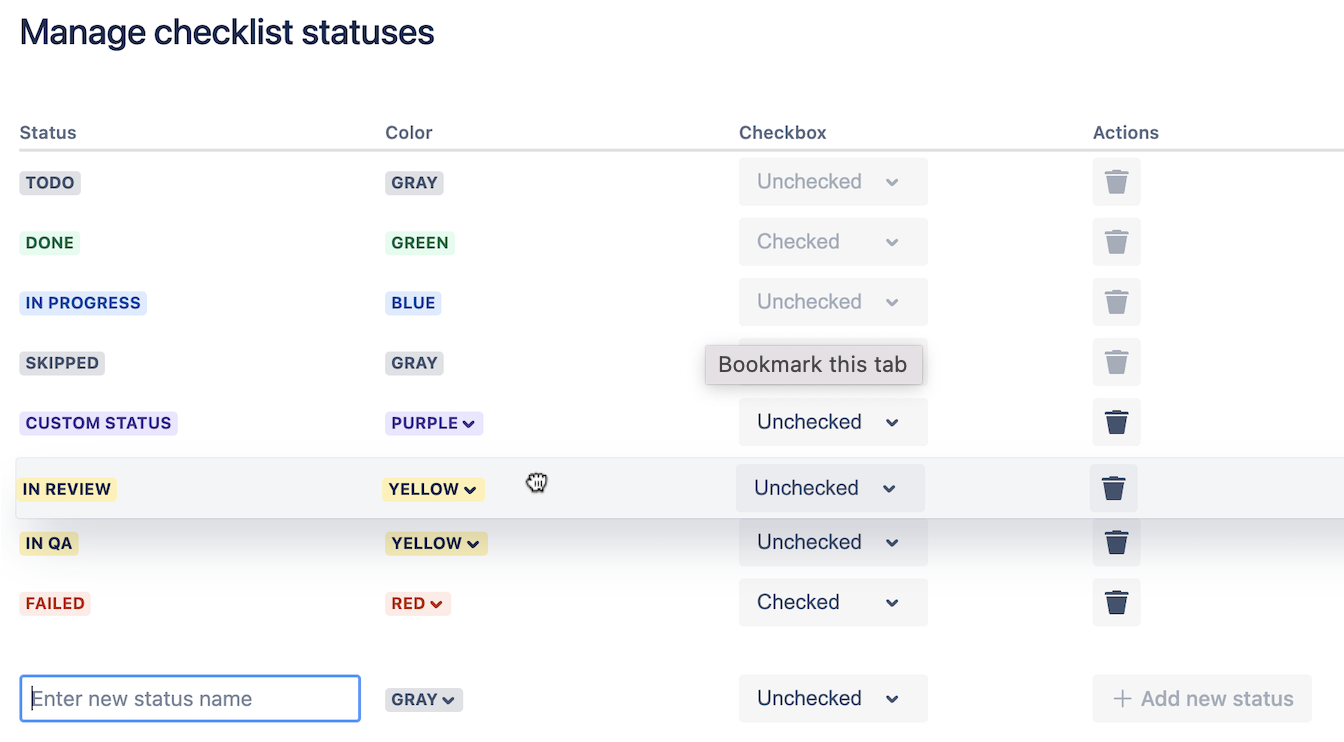
Drag&Drop the status row to reorder statuses in the way how you’d like them to be represented in checklist UI.
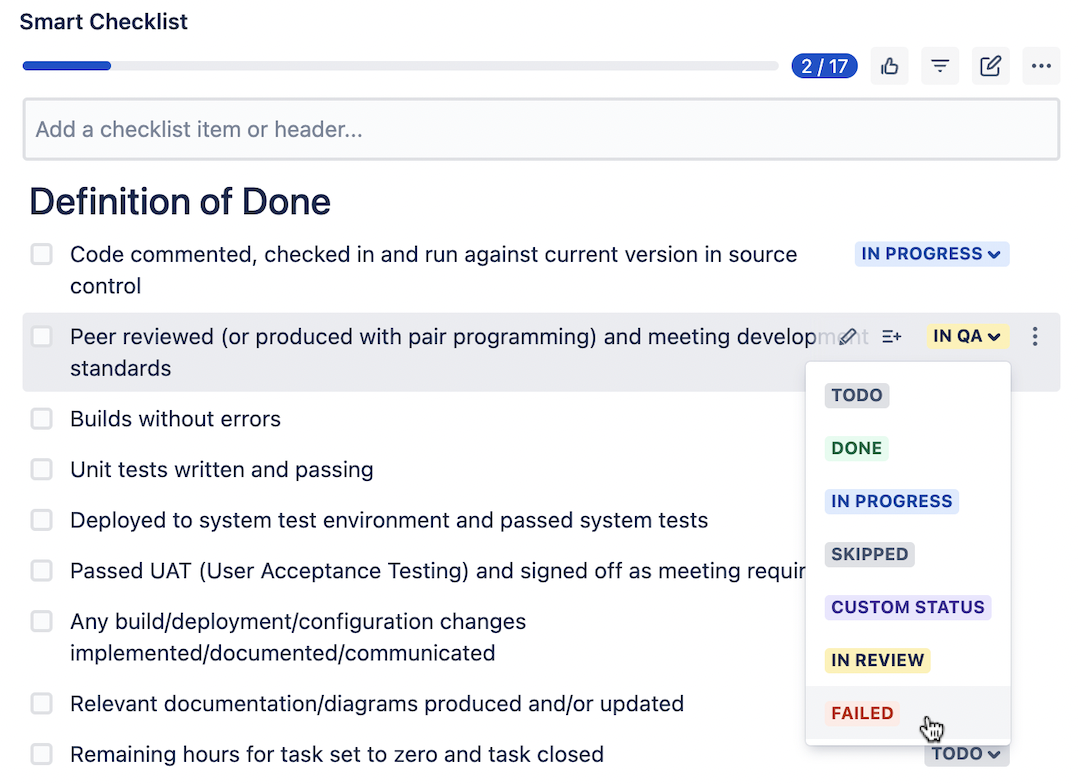
Change status in Smart Checklist UI:
Statuses are shown as dropdown in the right column of checklist items:
Custom status in RAW text format:
Custom statuses are represented as [statusname] following the state sign.
You Type | You Get | ||
|---|---|---|---|
|  |
You are all set! Hope everything works for you! 💪🏻
| Info |
|---|
For any questions or feature requests contact us: smartchecklist@railsware.com |