| Insert excerpt | ||||||||
|---|---|---|---|---|---|---|---|---|
|
| Tip |
|---|
Add Smart Checklist Templates to your Issue based on Filed Value right after the Issue is created⚡️ |
| Panel | ||
|---|---|---|
| ||
☝🏼IMPORTANT NOTE: Due to the upcoming transition to the Forge app, any automation relying on issue properties will need to be updated to use custom fields instead. Please review your automation rules and adjust them accordingly to ensure continued functionality. |
Automation with Issue properties
Go to Project Settings → Automation
...

...
Click Create Rule
...
Set When: New Trigger
Choose Issue created → Save

...
Add component New Condition

...
Set New Condition
Choose Issue fields condition
Select your needed custom field
Choose the condition equals
Add the value of your custom field
Save Condition


...
Add component New Action

Set New Action
...
Choose Set entity property

...
Choose Entity type: Issue
...
→ click Create rule:
...
Create a trigger
2.1. Choose Issue created
2.2. Save trigger
...
Add your Custom Value
3.1. Add component: Add a condition
...
3.2. Add a condition: Issue fields condition
...
3.3. Select the needed Issue Field
3.4. Choose the condition equals (in any order)
3.5. Add the value of your Custom Field
...
| Panel | ||||||
|---|---|---|---|---|---|---|
| ||||||
In this case, we will add a Checklist if the Issue contains a
You are free to choose a Custom Field value based on your needs 🙌🏻 |
3.6. Save Condition
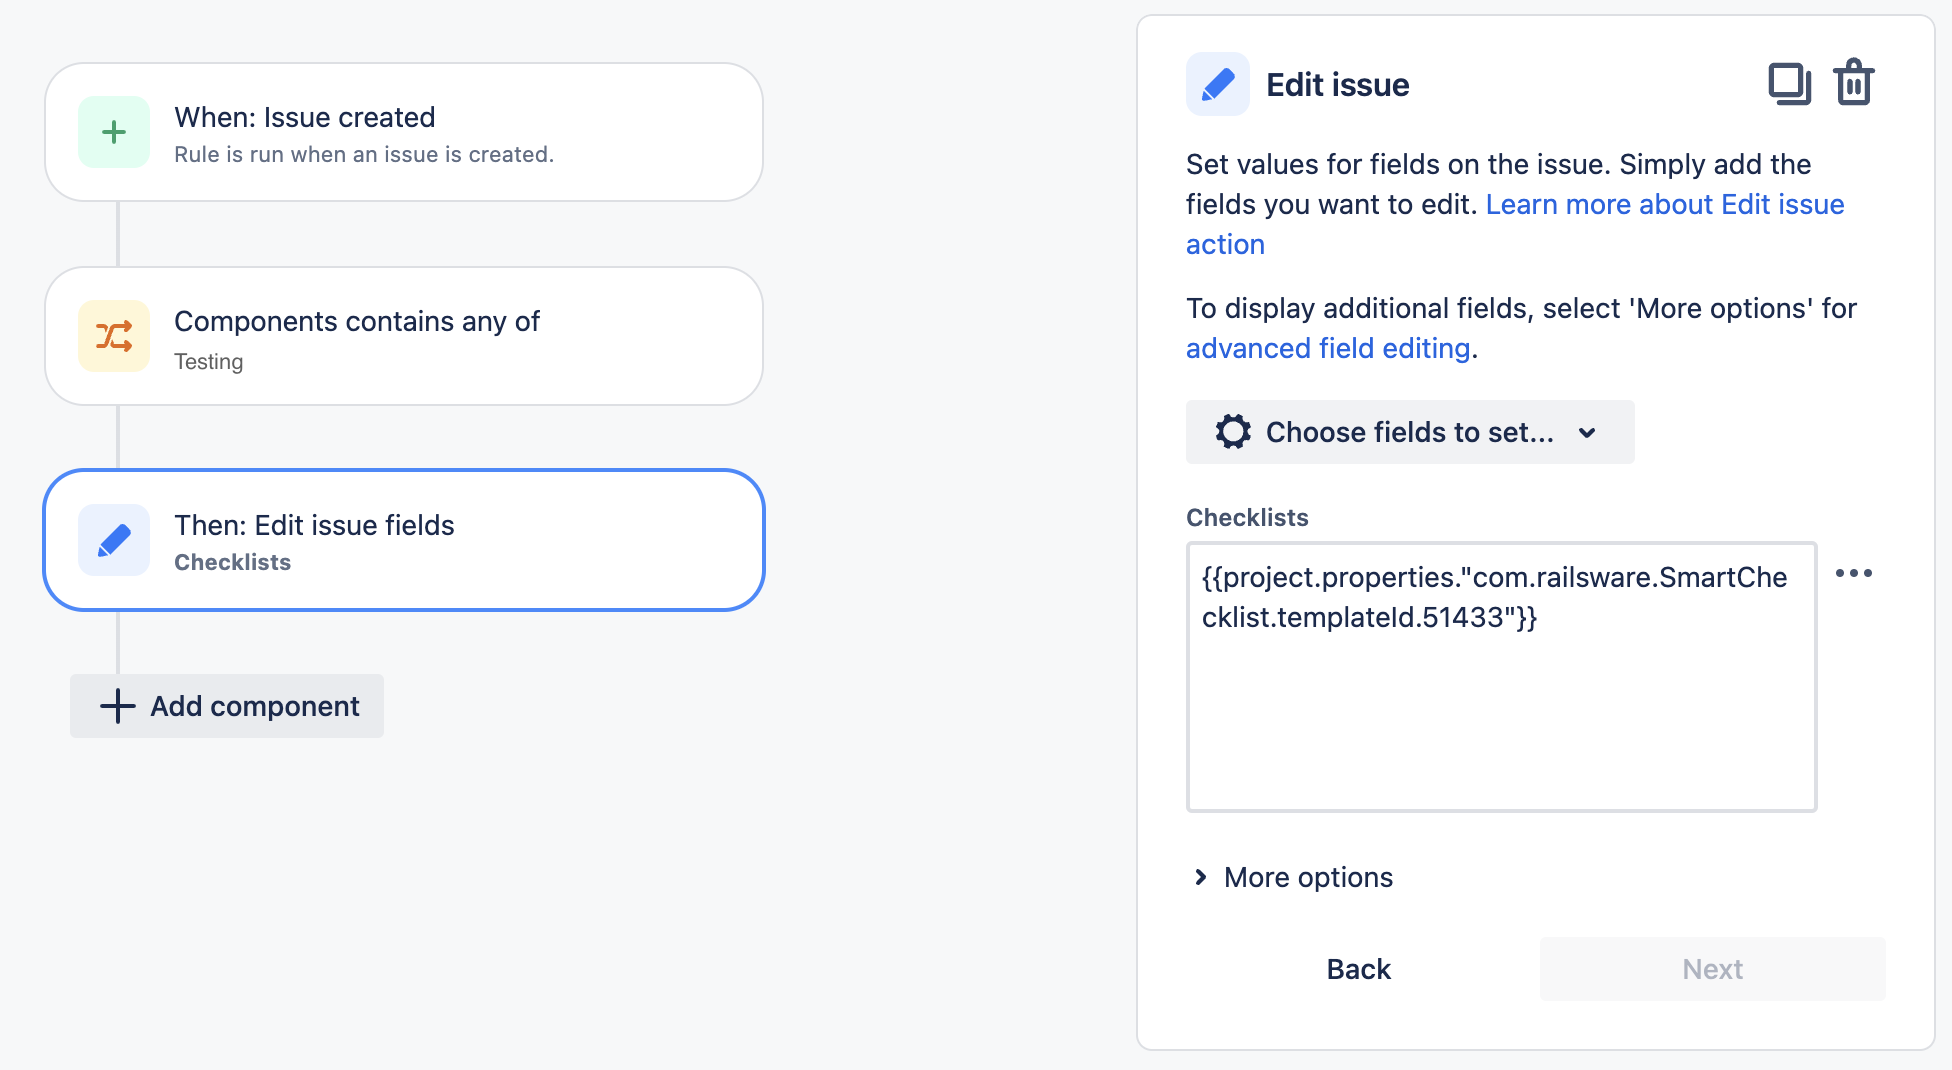
Add a Checklist or Template
4.1. Add component: Add an action
...
4.2. Choose Set entity property
...
4.3. Fill in the fields with the following values:
Entity type |
| ||
Property Key |
| ||
Property Value |
| ||
Add |
...
Checklist items in Markdown formatting |
...

...
Save Action
...
👉🏻 |
| |||||||
Add the template to the Smart Checklist 👉🏻 |
|
...
4.4. Save Action
Name your new Automation and Turn it on
...
You're done! Now every time an
...
Issue with a defined
...
Custom Field value is created - a proper Checklist or Template will be added
...
🎉
Jira Automation with the Checklists custom field
| Panel | ||
|---|---|---|
| ||
💡HINT: This flow can also be achieved by using the Checklist custom field. Just follow these steps:
You are free to choose the way to set up the automation rule that suits you. Both flows will have the same outcome 🙌🏻 |
| Insert excerpt | ||||||||
|---|---|---|---|---|---|---|---|---|
|